As an Amazon Associate I earn from qualifying purchases. Affiliate links may earn a commission at no additional cost to you.
Jump to the ideas
THREE OPTIONS FOR YOUR ROUTINE
Hair Styling Essentials
Paid links · Amazon searches. Check product details and suitability on Amazon.Hey friends, it’s Nadia! A pixie can change its mood with a side sweep, a little root lift, or one small accessory. You do not need to disguise the short length to make it feel dressed up. These ideas start with an existing pixie and explore different evening finishes.
Affiliate disclosure: This post contains affiliate links. I may earn a commission from qualifying purchases at no additional cost to you. As an Amazon Associate I earn from qualifying purchases.
If you are comparing accessories and party finishes, you can also browse 15 Best Haircuts to Get Before Christmas.
Choosing Your Look
Start with a reference close to your current length and texture. A small accessory can change the finish, but it cannot supply missing length or make a tight style comfortable. Choose the hair detail around your outfit neckline and the amount of styling time you want to spend.
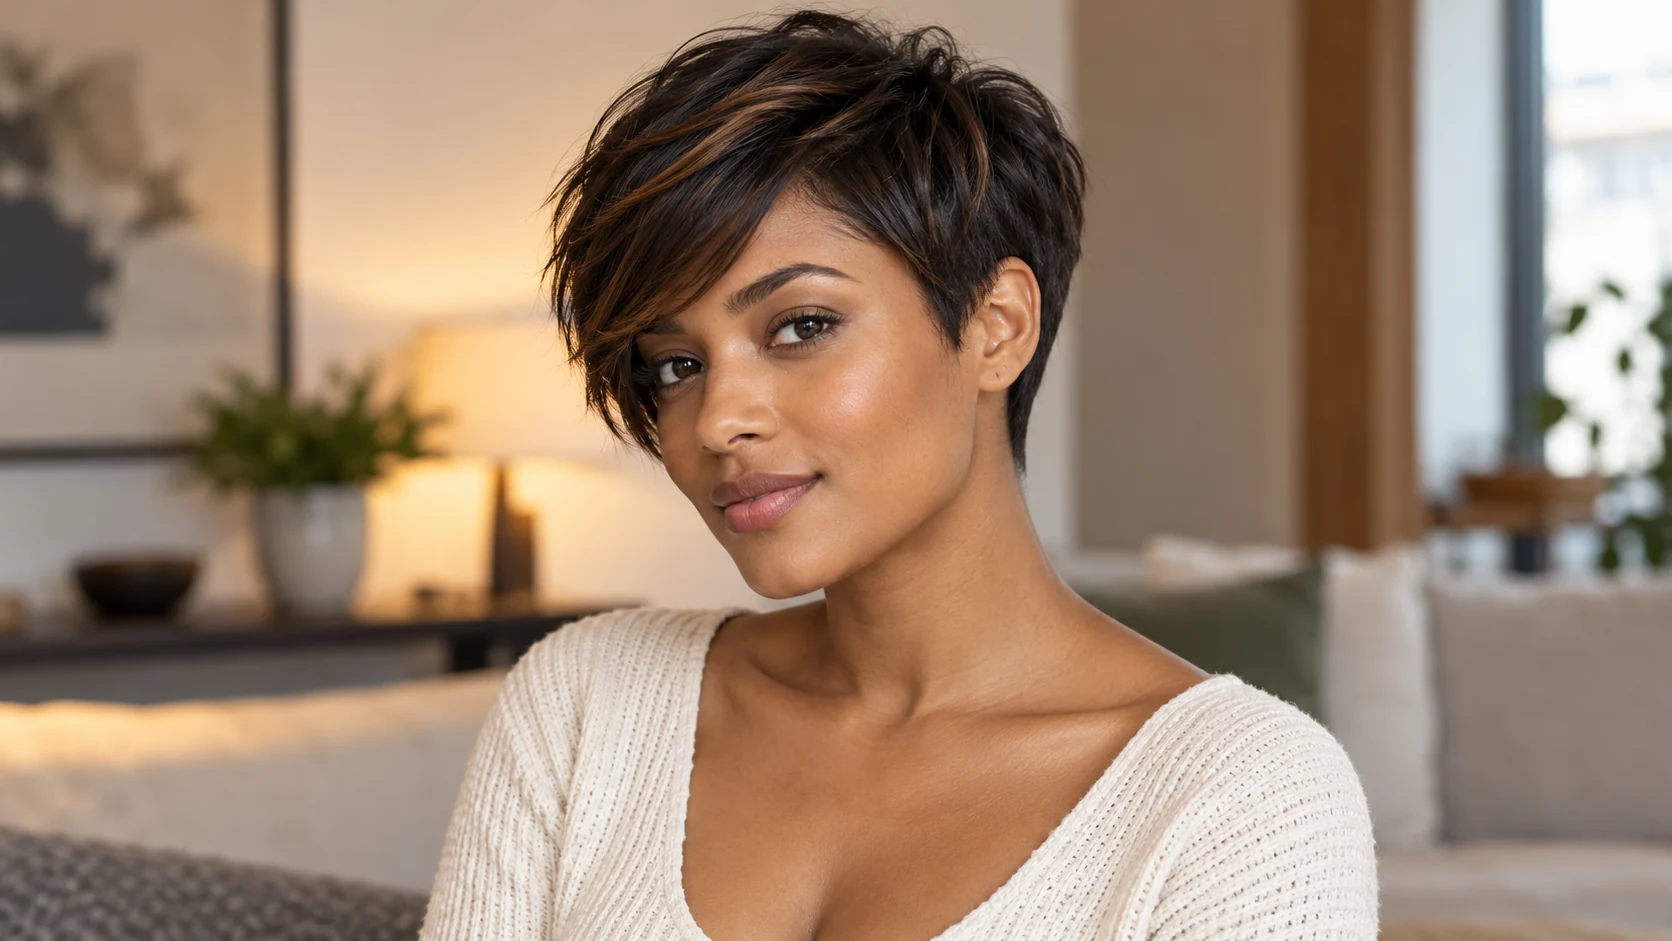
1. Smooth Side-Swept Pixie
The longer top sweeps smoothly across the forehead while the sides stay close and soft.
- Best For: Pixies with a longer top; a polished dinner look.
- How to Style: Dry the top in the desired direction with a small brush or fingers. Smooth only a tiny amount of finishing product through the surface.
Styling Tip: A soft side sweep does not require flattening every strand.
2. Lifted Quiff Pixie
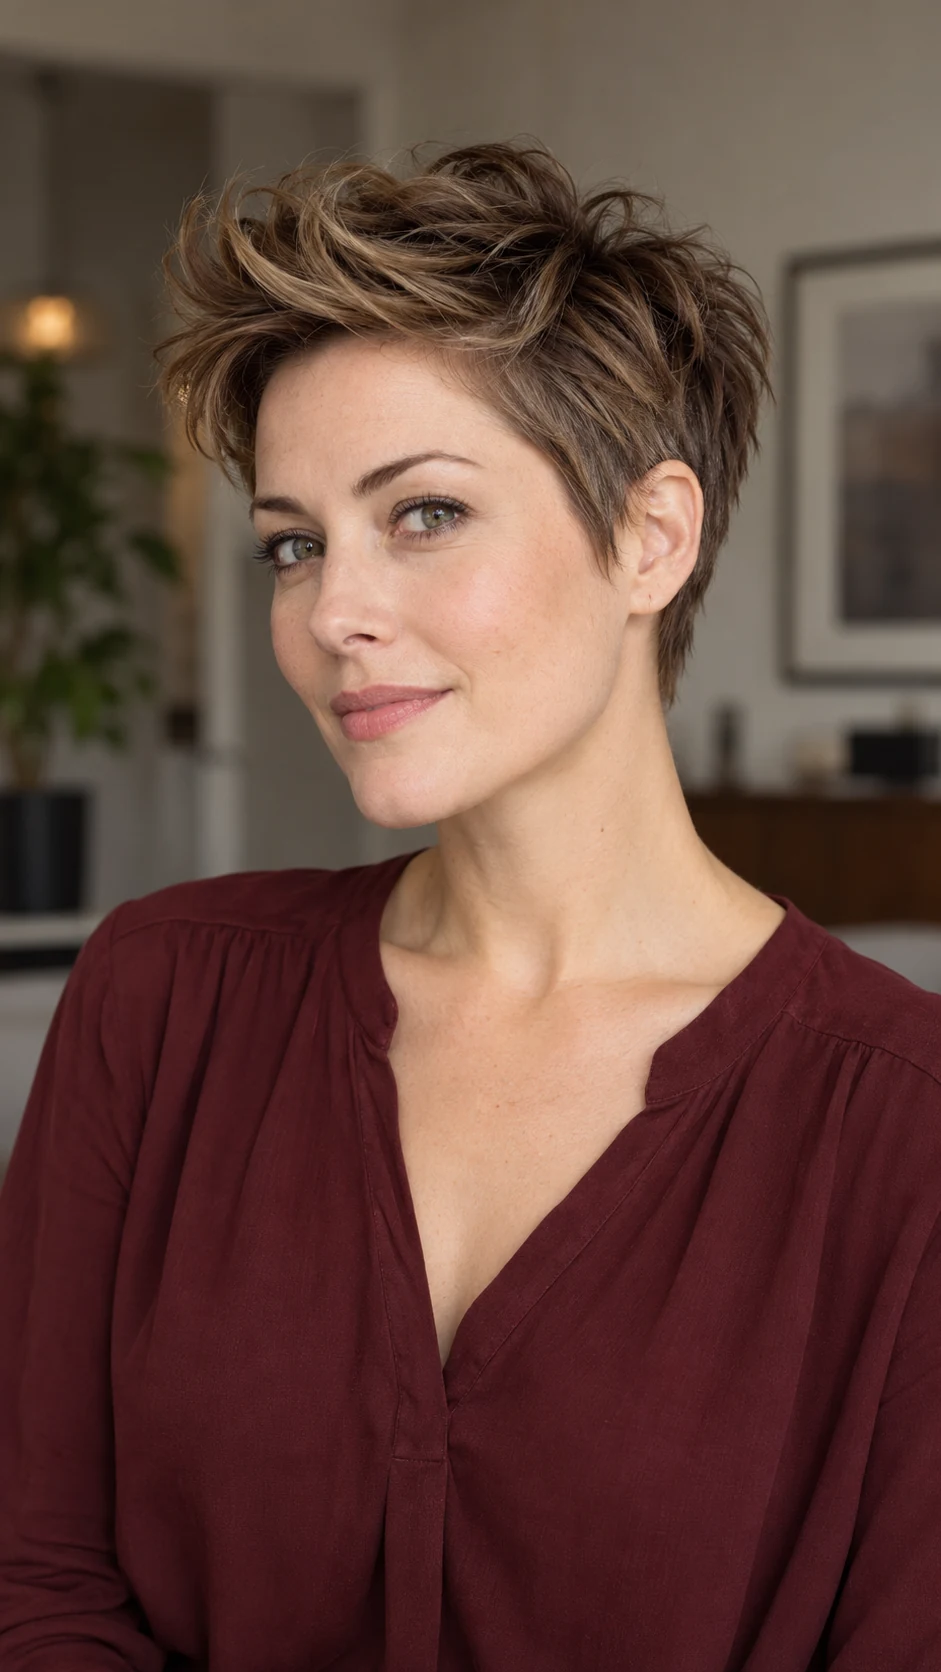
A short back and sides contrast with a gently lifted front quiff.
- Best For: Pixies with enough front length; a party silhouette with height.
- How to Style: Lift the front while drying, let it cool, and shape with a small amount of suitable product.
Styling Tip: Keep the lift comfortable rather than stiff and sharply peaked.
3. Glossy Deep-Part Pixie
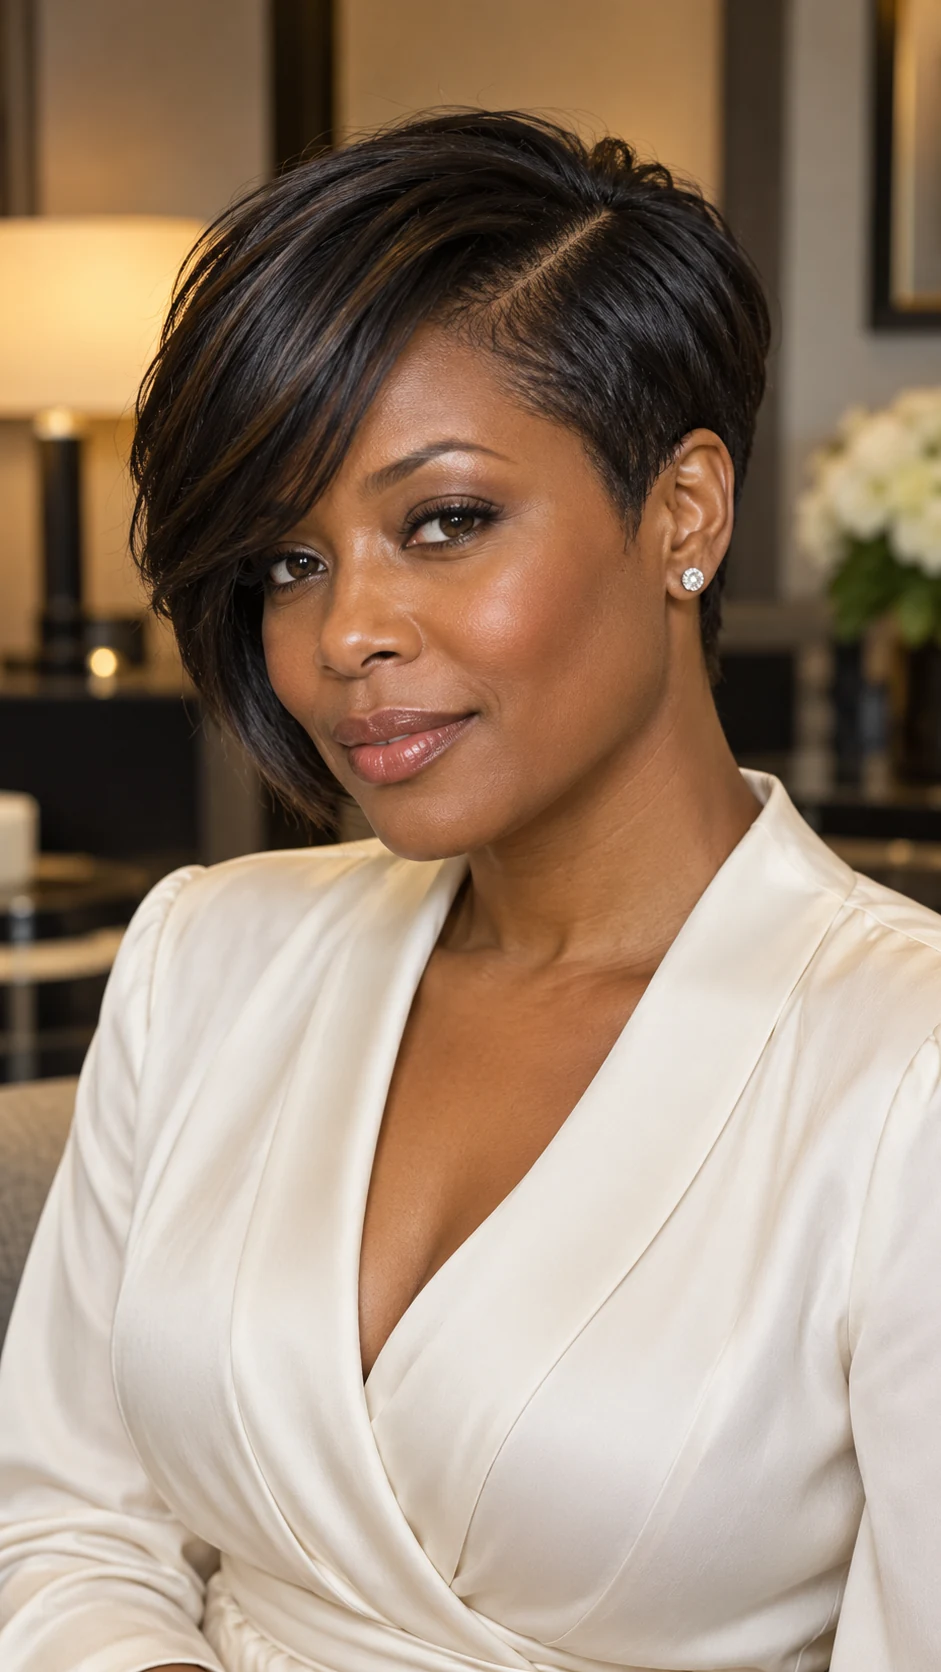
A clear side part divides a glossy longer top from smooth short sides.
- Best For: Straight or straight-styled pixies; a formal evening.
- How to Style: Set the part on damp hair and dry the top over to one side. Add a light finishing product without coating the scalp.
Styling Tip: A little shine is enough; excess product can collapse the top.
4. Softly Tousled Evening Pixie
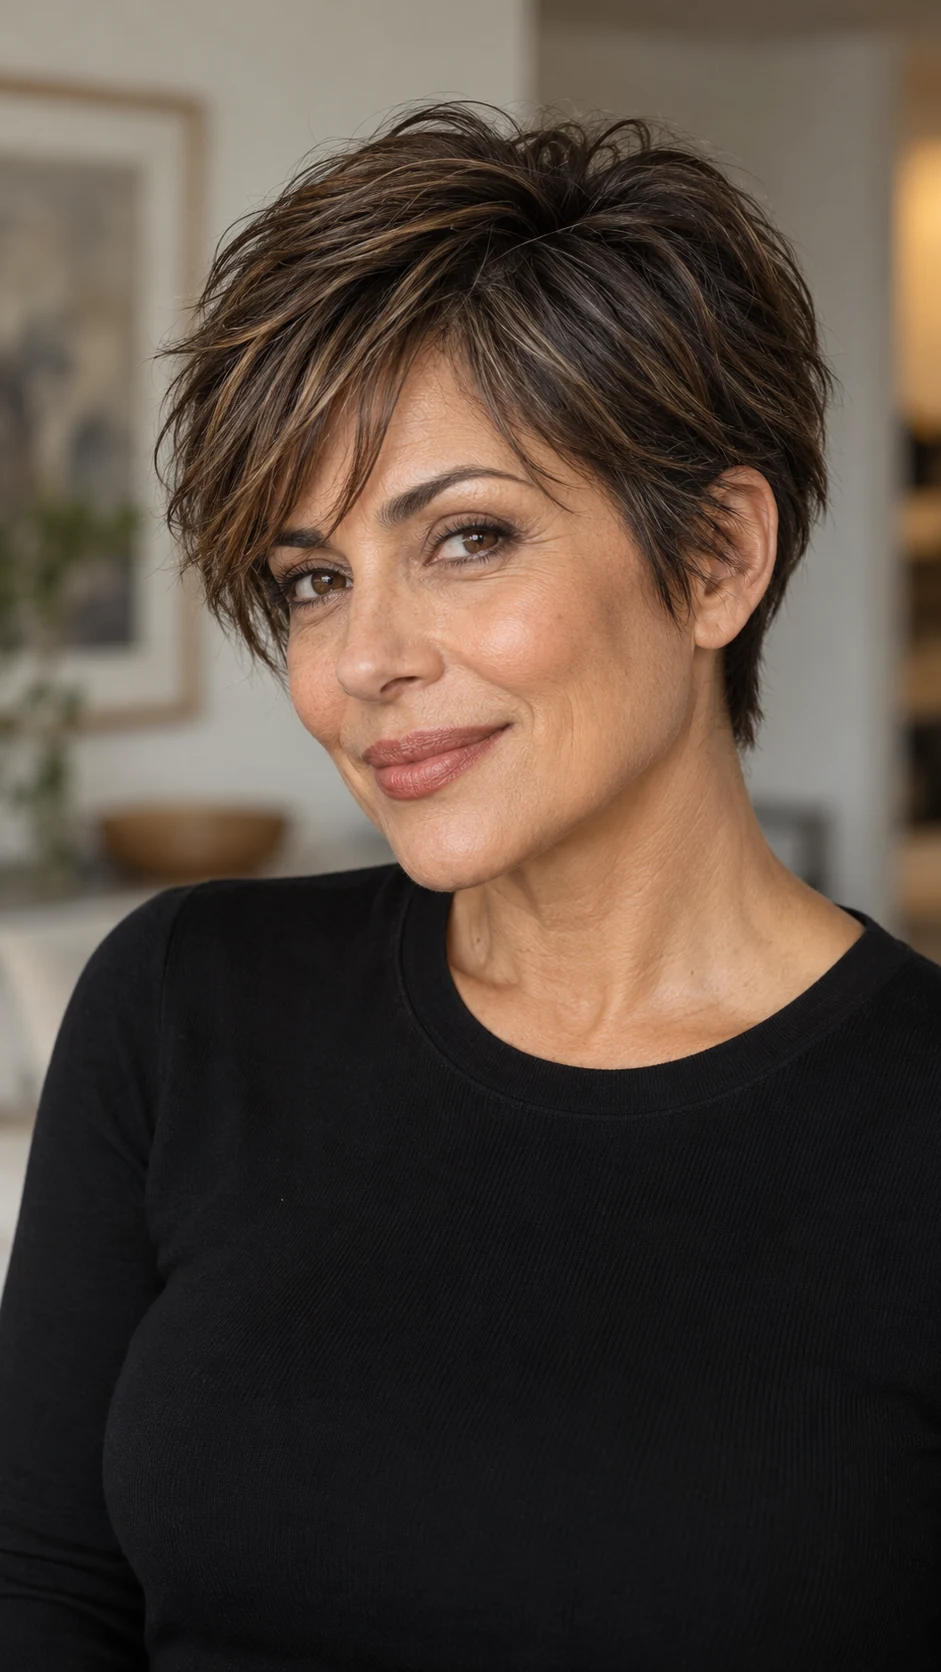
Separated pieces create gentle texture through the top while the outline stays neat.
- Best For: Straight or wavy pixies; relaxed parties.
- How to Style: Dry into the natural direction, then define a few top pieces with fingertips.
Styling Tip: Choose a handful of pieces instead of twisting every strand.
5. Curly Pixie With Defined Fringe
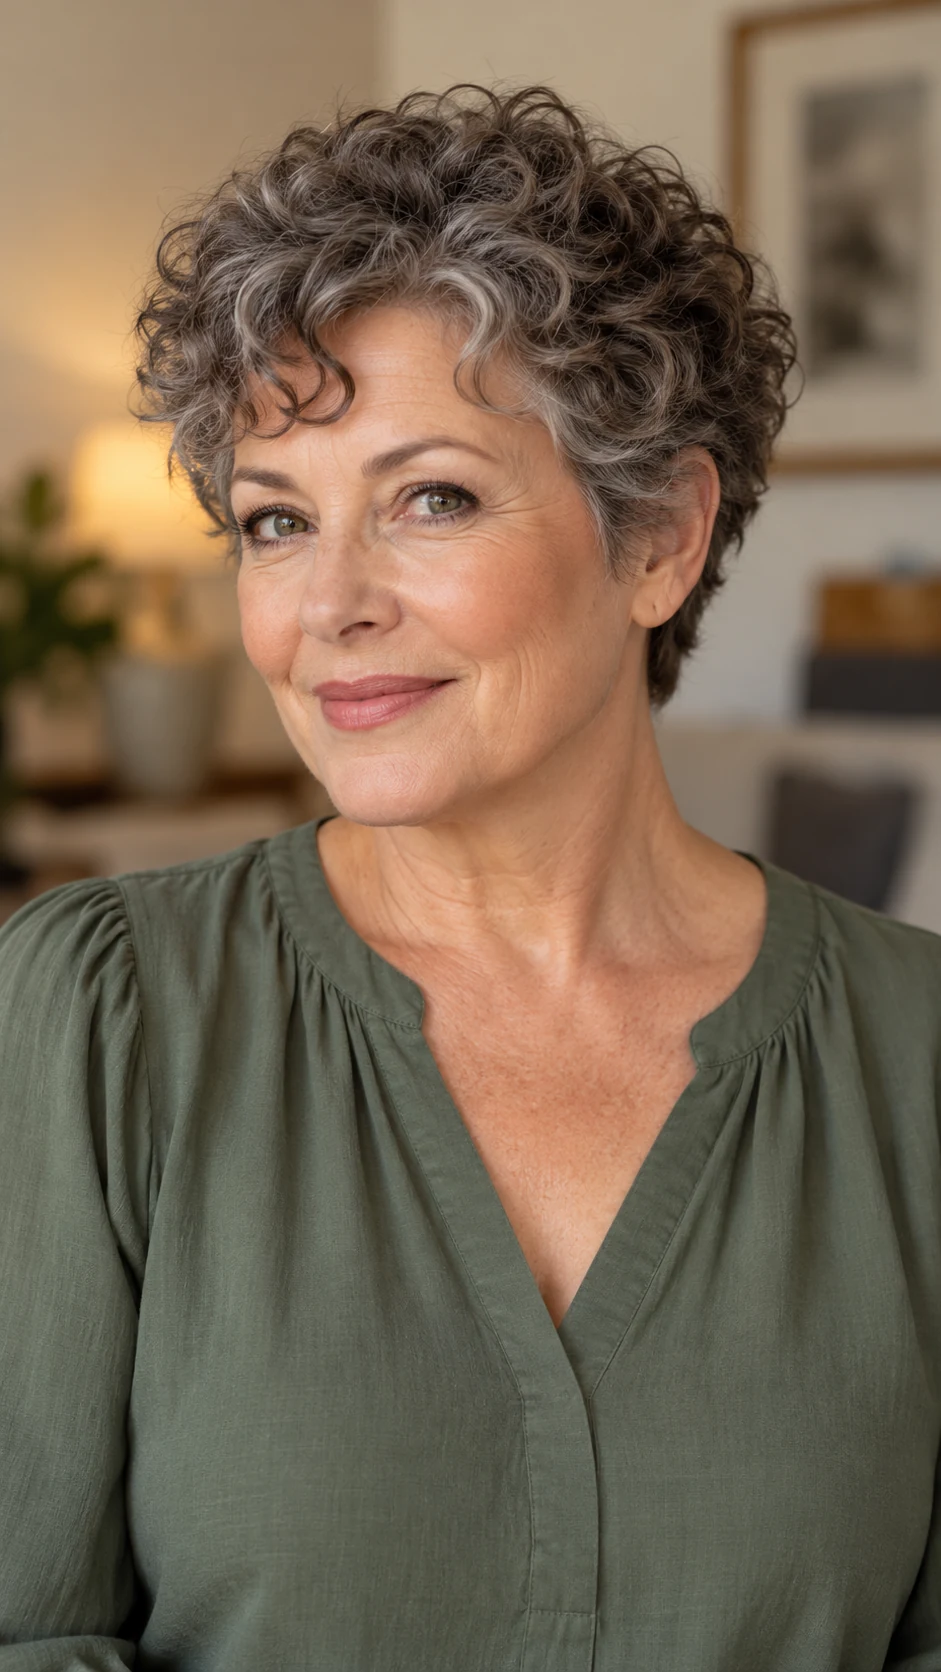
Short natural curls form a rounded top with a small curl fringe.
- Best For: Curly pixies; a dressy natural-texture look.
- How to Style: Define damp curls with your usual product and let them dry fully. Arrange the fringe with fingers rather than a brush.
Styling Tip: Preserve the natural curl spring around the forehead.
6. Coily Pixie With a Rounded Top
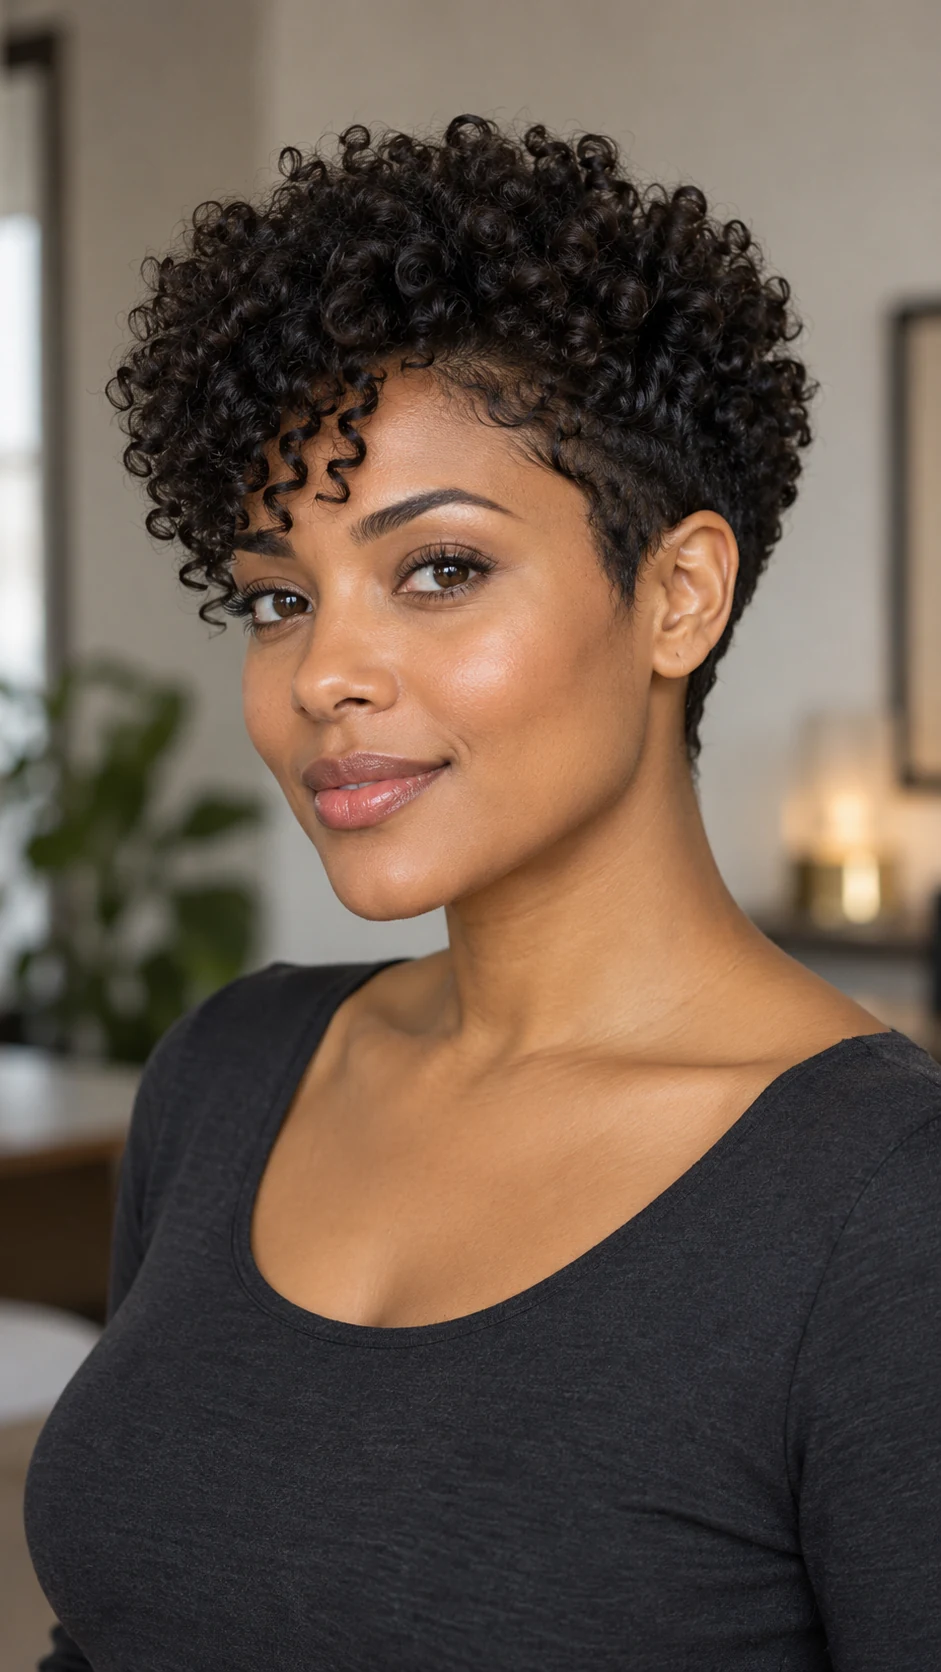
Coily texture forms a controlled rounded top above a neat short outline.
- Best For: Coily pixies; a sculpted party shape.
- How to Style: Use your normal definition routine and dry fully. Shape the outline gently with fingers or appropriate styling tools.
Styling Tip: Definition does not need a tight hairline or heavy edge product.
7. Pixie With a Tiny Crystal Slide
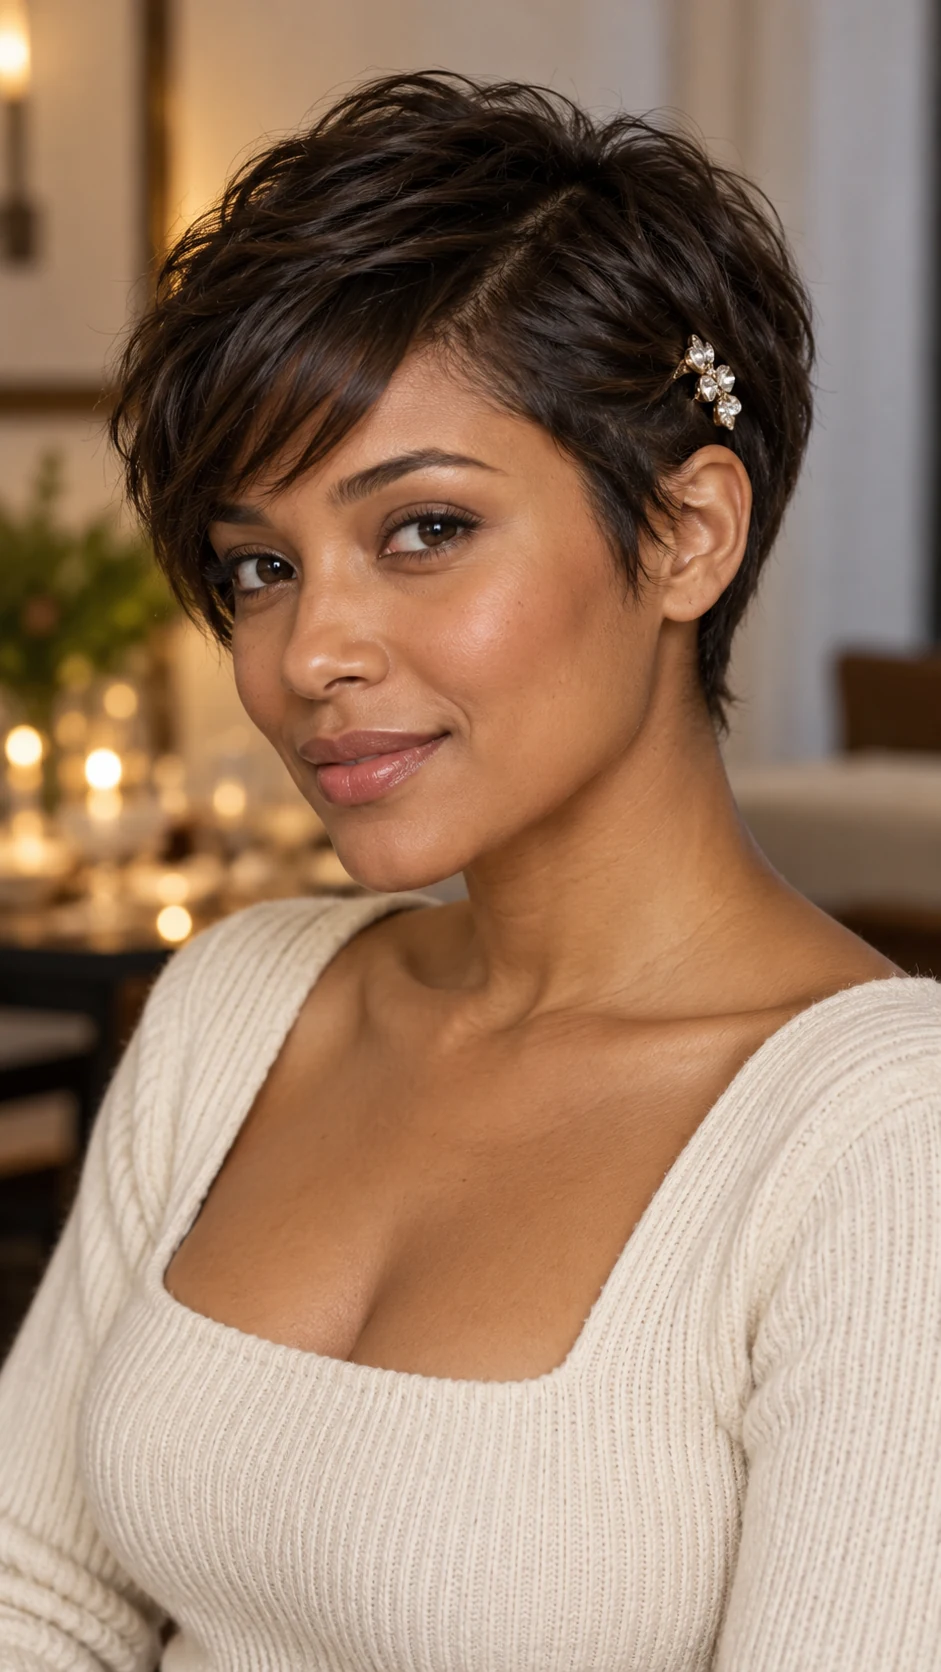
A side-directed pixie has one fine crystal slide near the temple.
- Best For: Pixies with enough side length to hold a clip; festive dinners.
- How to Style: Style the top first, then place the slide in a small side section.
Styling Tip: If the clip slides, choose a smaller accessory rather than pulling harder.
8. Soft Faux-Hawk Pixie
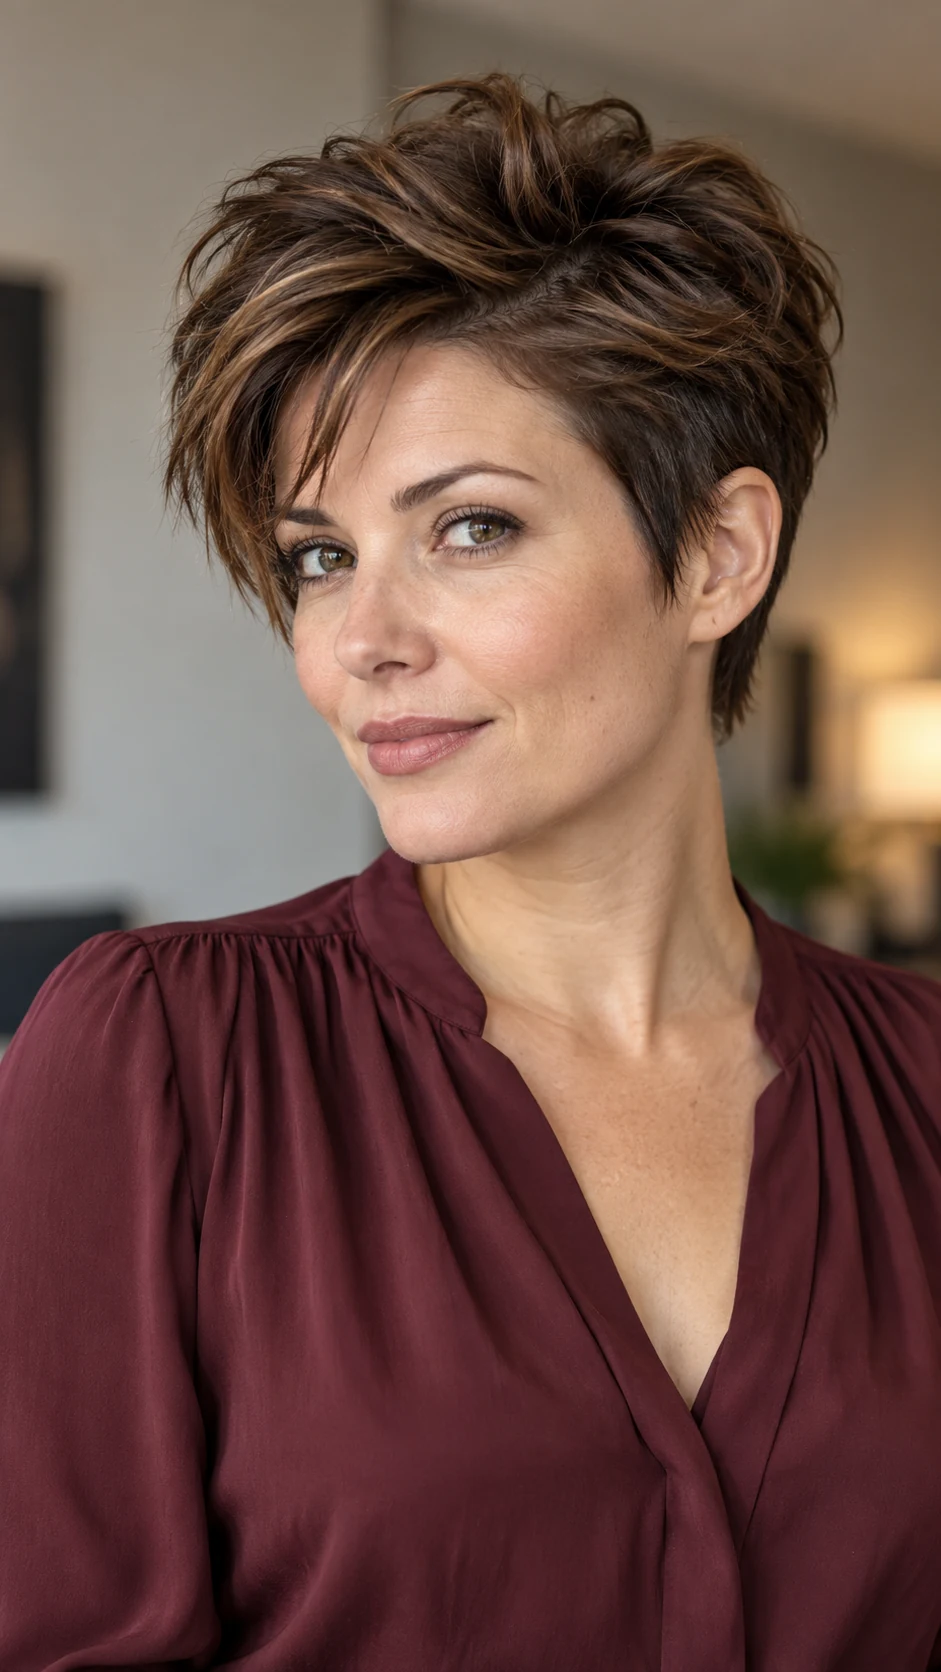
The center top rises slightly while both sides direct inward toward it.
- Best For: Pixies with longer central length; a bolder evening style.
- How to Style: Dry the sides inward and lift the center with fingers. Set lightly while preserving some movement.
Styling Tip: This is styling, not a requirement to shave the sides.
9. Rounded Blow-Dried Pixie
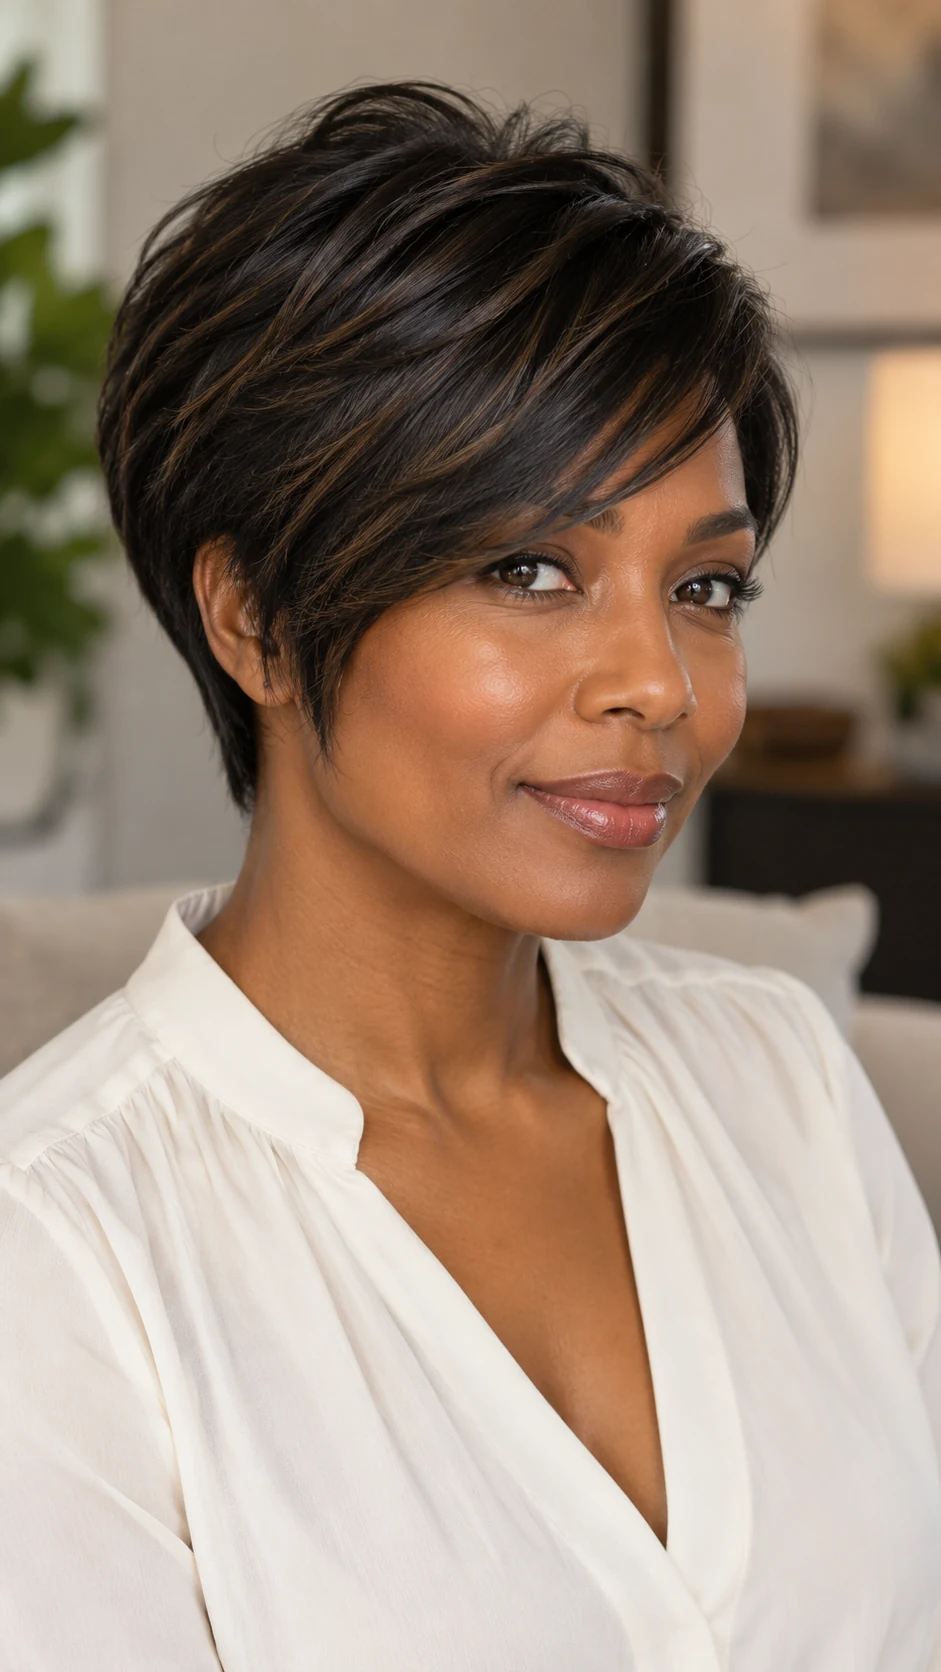
The longer top forms a gentle dome with a curved side fringe.
- Best For: Longer pixies; a classic polished finish.
- How to Style: Dry small sections over a small brush or with controlled finger shaping. Let the front cool in its curve.
Styling Tip: Keep the roundness proportional to the length available.
10. Piecey Fringe Pixie
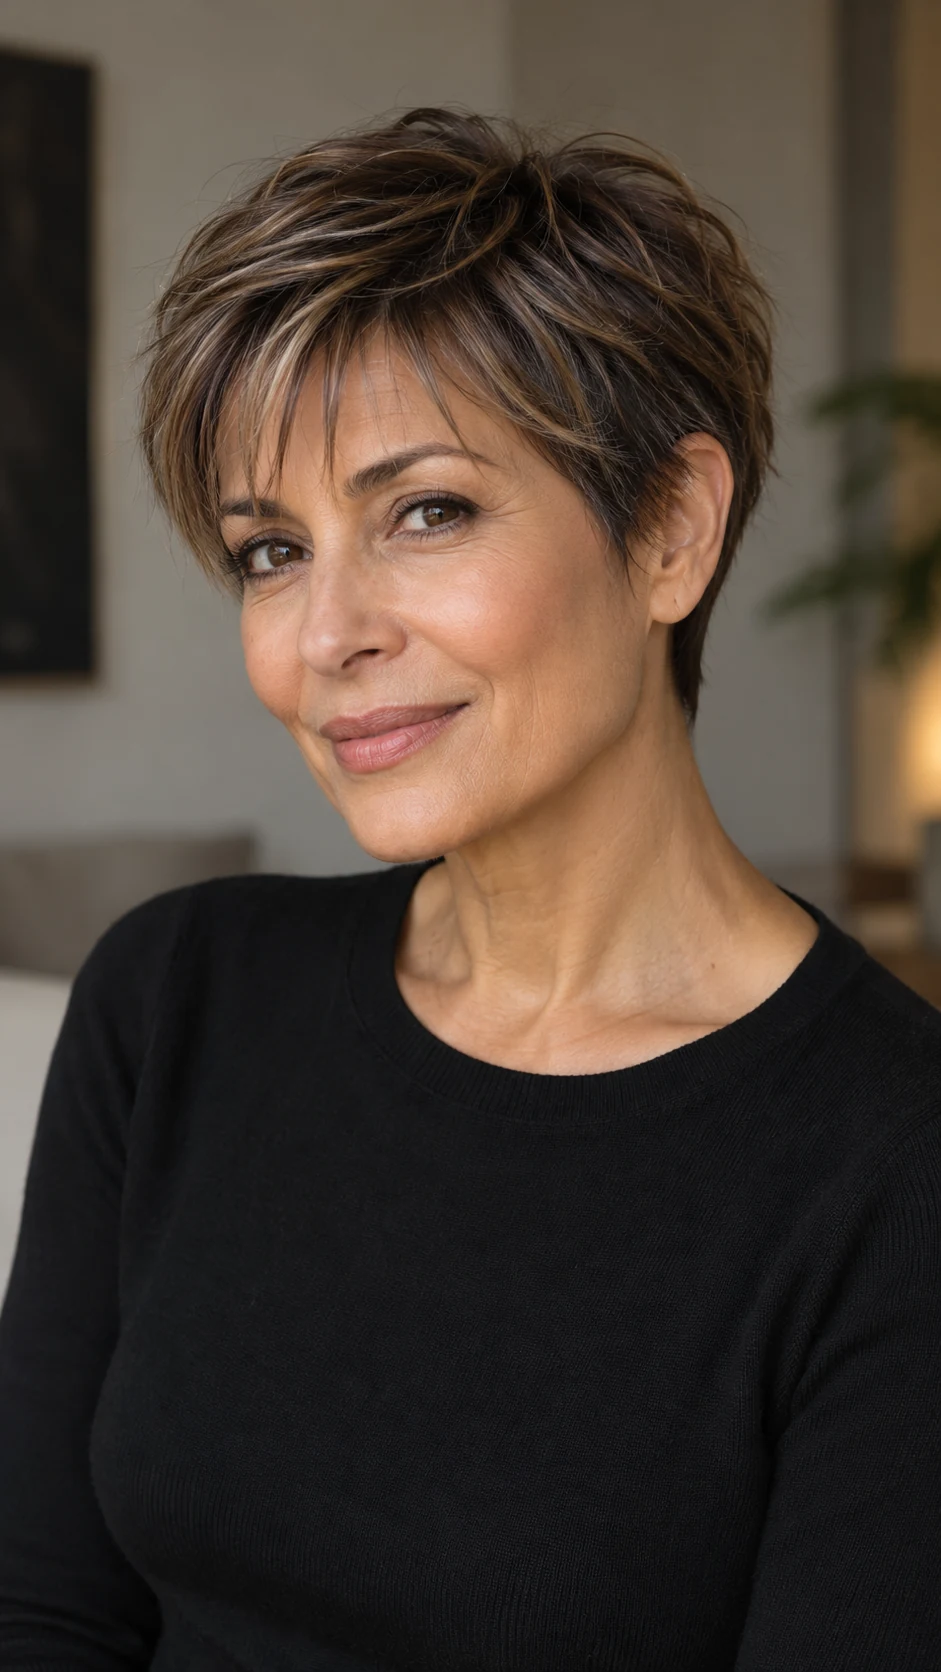
A light fringe separates into a few fine pieces above the brows.
- Best For: Pixies with a fringe; an understated party option.
- How to Style: Dry fringe forward, then separate selected ends with a tiny amount of product.
Styling Tip: Avoid adding product at the roots where it can look greasy.
11. Slicked-Back Soft Pixie
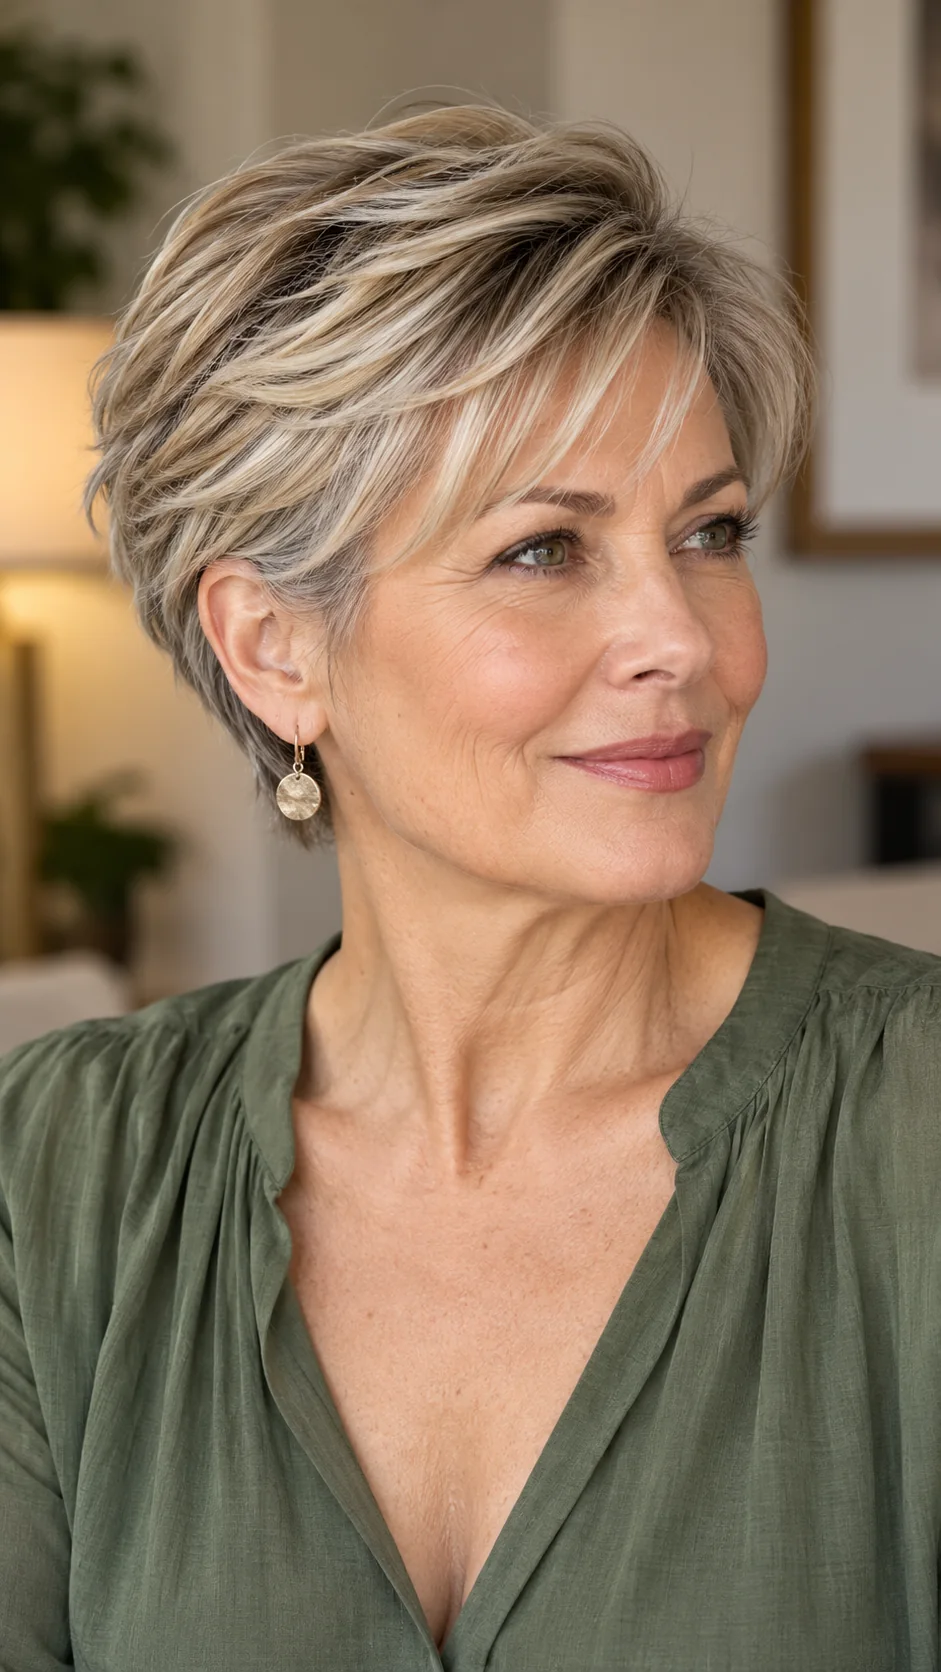
The longer top directs backward with a smooth surface and modest root height.
- Best For: Pixies with enough top length; open necklines and earrings.
- How to Style: Dry backward without pulling hard, then smooth the surface with a light styling product.
Styling Tip: Keep a little softness at the front for a less severe outline.
12. Wavy Pixie With a Side Bend
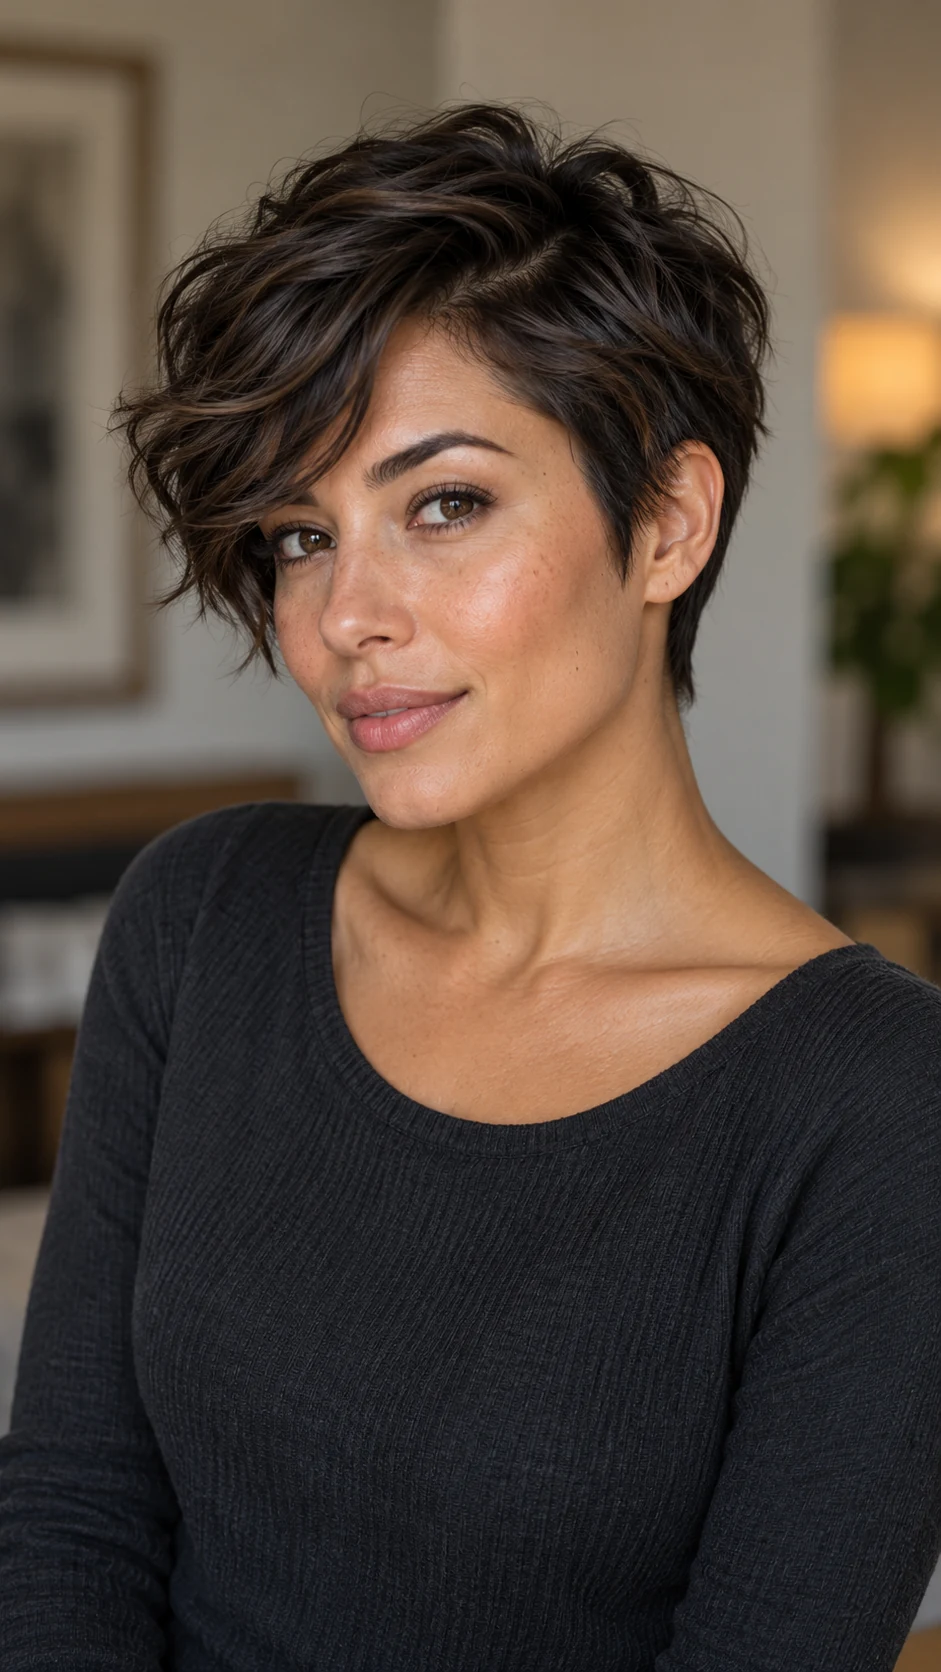
A natural wave bends across the longer top above tidy sides.
- Best For: Wavy pixies; easy evening texture.
- How to Style: Encourage the wave while damp and allow it to dry in place. Refine one front bend if needed.
Styling Tip: Work with the existing wave instead of straightening first.
13. Pixie With a Narrow Velvet Band
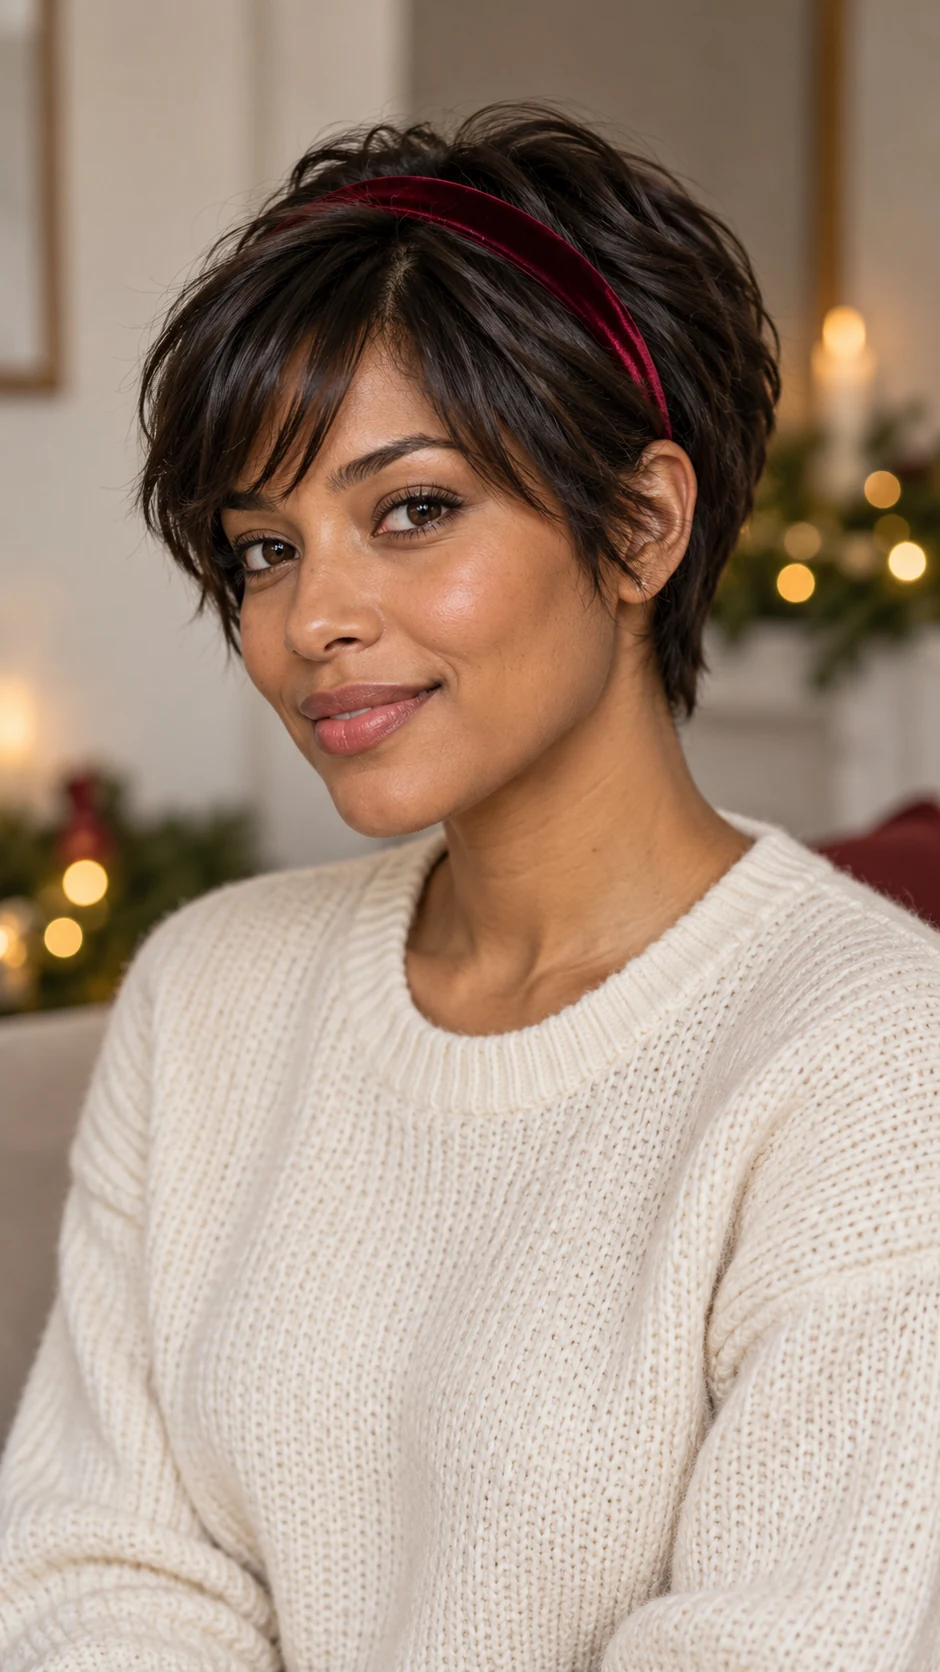
A slim burgundy velvet band sits behind a softly directed fringe.
- Best For: Longer pixies; a simple holiday accessory.
- How to Style: Style the fringe and top before placing the band just behind them.
Styling Tip: Check that the band does not push short ends upward awkwardly.
14. Asymmetric Long-Top Pixie
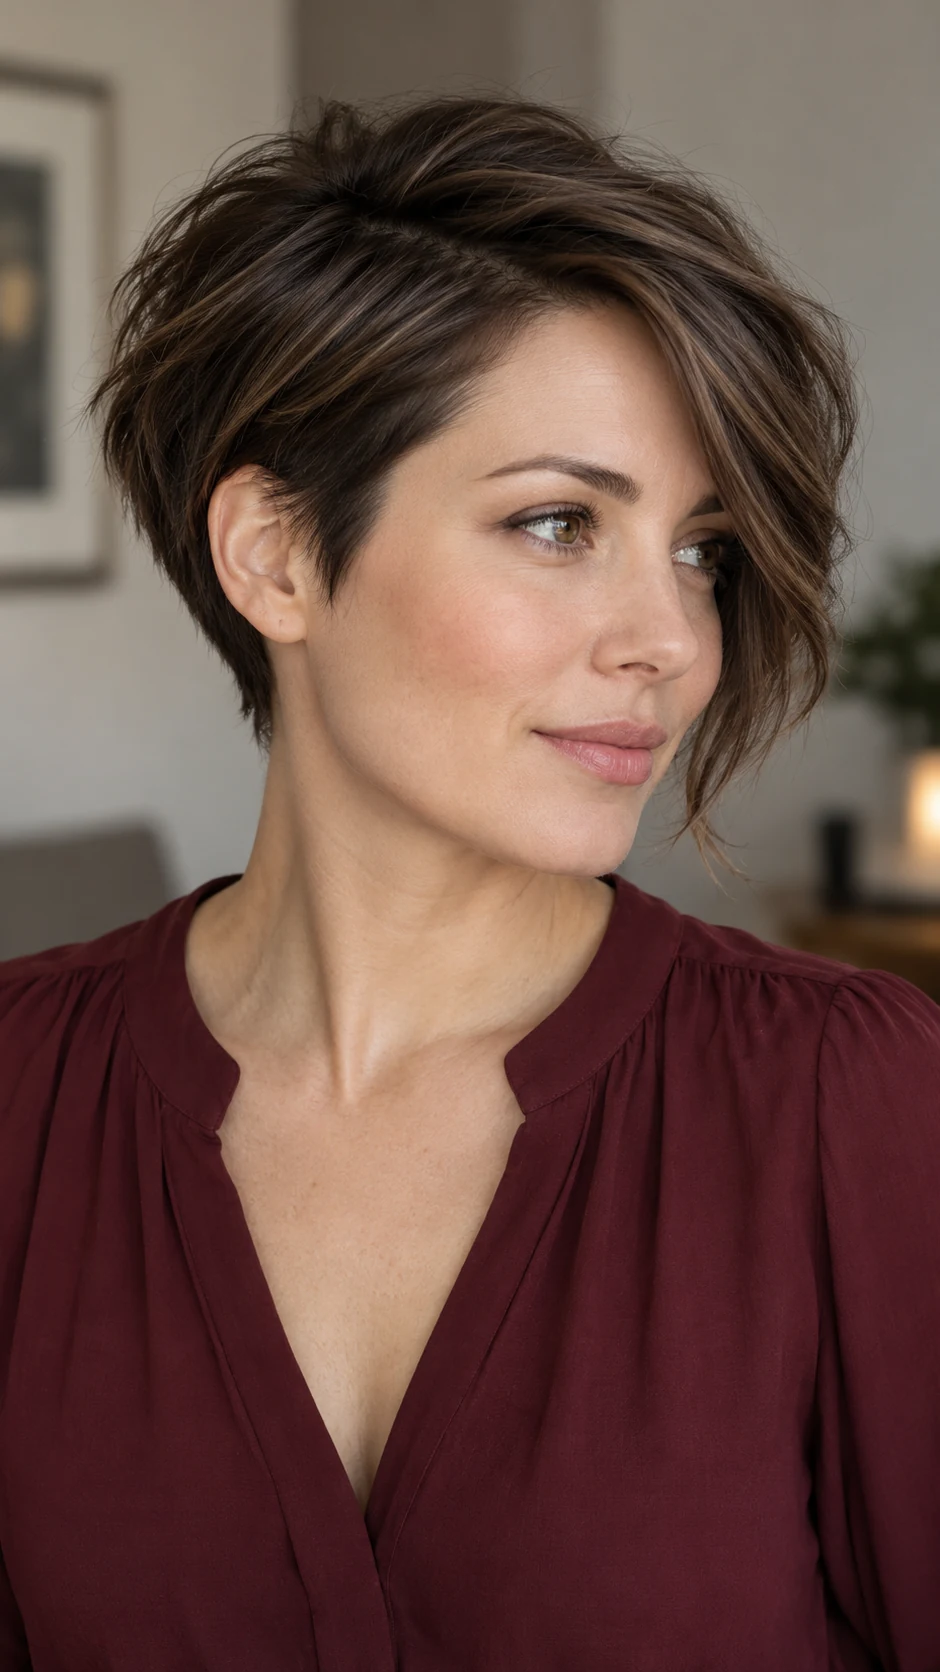
A longer top sweeps toward one cheek while the opposite side stays open.
- Best For: Existing longer-top pixies; a dramatic side profile.
- How to Style: Direct the longer section across and slightly down. Keep the shorter side clean without forcing it flat.
Styling Tip: If your cut lacks this length, treat the image as a haircut reference.
15. Silver-Gray Pixie With Airy Texture
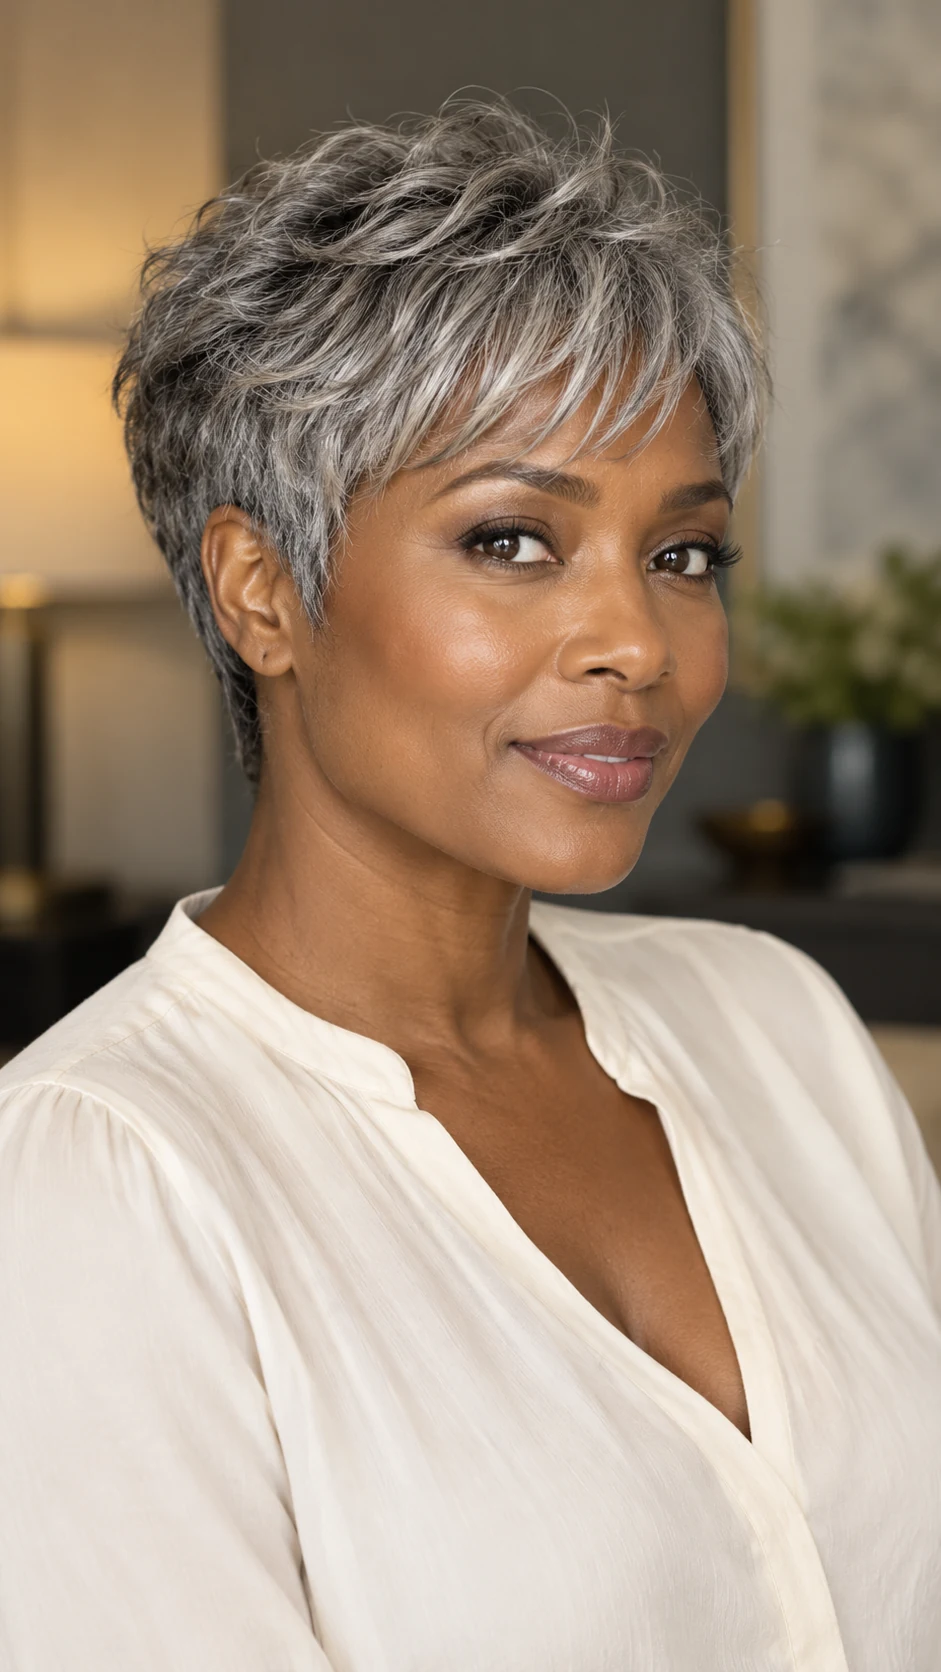
Natural silver-gray hair forms soft lifted pieces through a neat pixie outline.
- Best For: Silver or gray pixies; a light reflective evening finish.
- How to Style: Dry with gentle root lift and define only the ends. Use products compatible with your hair’s needs.
Styling Tip: A styling product cannot replace a haircut that supports the shape.
Shopping Notes for This Look
Check the accessory’s dimensions, weight, backing and grip against your hair length and density. A decorative clip should finish a secured style rather than hold the entire style on its own.
Paid links · These Amazon searches show similar supplies, not verified exact products, prices or availability.
Practical Tips
Choose a reference with a similar top length. Use small amounts of product, then add only if needed. If a look needs considerably more length than your cut has, save it as a future haircut reference rather than forcing the style.
- Try the finished look with your earrings and neckline before the event.
- Secure the main shape before adding decorative clips or pins.
- If a style hurts or pulls, loosen it rather than adding more tension.
Final Thoughts
Choose the version that feels comfortable and suits the evening you have planned. One secure shape and one well-chosen detail can look more intentional than trying to include every accessory at once. A holiday hairstyle should leave you free to enjoy the occasion.
For more looks to compare before your next event, explore 20 New Year’s Eve Hairstyles for a Glam Night Out.

ABOUT THE AUTHOR
Nadia James
Hi, I’m Nadia James, the creator of Nadia Daily Living. I share easy beauty ideas, plus-size fashion, cozy home décor, simple recipes, and everyday inspiration to help women feel confident and make life feel more beautiful.
More from Nadia James →