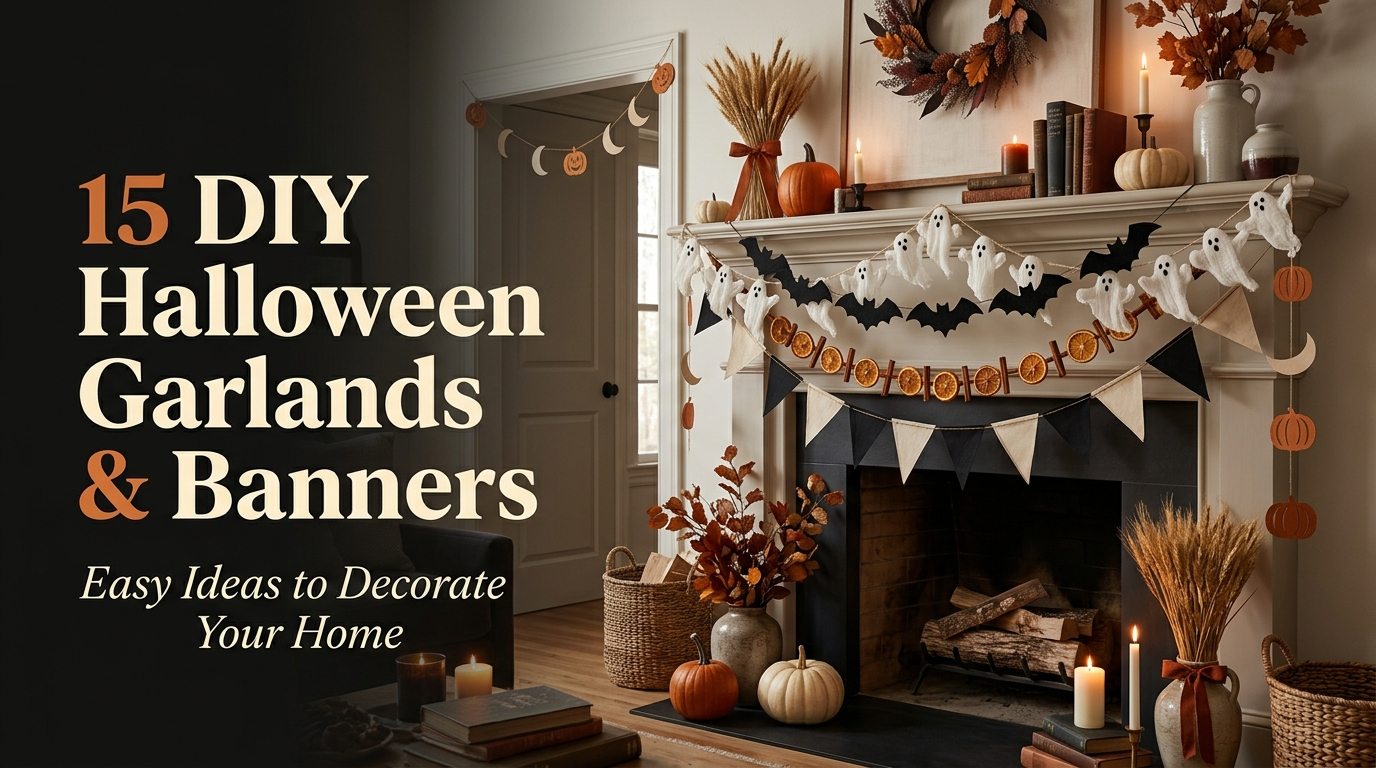
15 DIY Halloween Garlands and Banners for Your Home
Hi friend! 🖤
If you’re anything like me, garlands and banners are one of my favorite ways to decorate for Halloween. They’re simple, they’re affordable, and they instantly make a room feel finished.
The best part is you don’t need to be crafty to pull these off. Most of these DIY Halloween garlands and banners take less than an hour, and many use supplies you probably already have at home.
Below you’ll find 15 easy garland and banner ideas for mantels, staircases, doorways, and windows. Some are spooky, some are soft and cozy, and all of them are budget-friendly and beginner-approved.
Let’s get crafting.
Quick Style Guide
Best For: Mantels, Staircases, Doorways, Windows, Party Spaces, Kids’ Rooms
Decor Style: Farmhouse, Modern, Cottage, Boho, Minimalist, Traditional
Budget: $
Difficulty: Easy
15 DIY Halloween Garlands and Banners for Your Home
1. Cheesecloth Ghost Garland
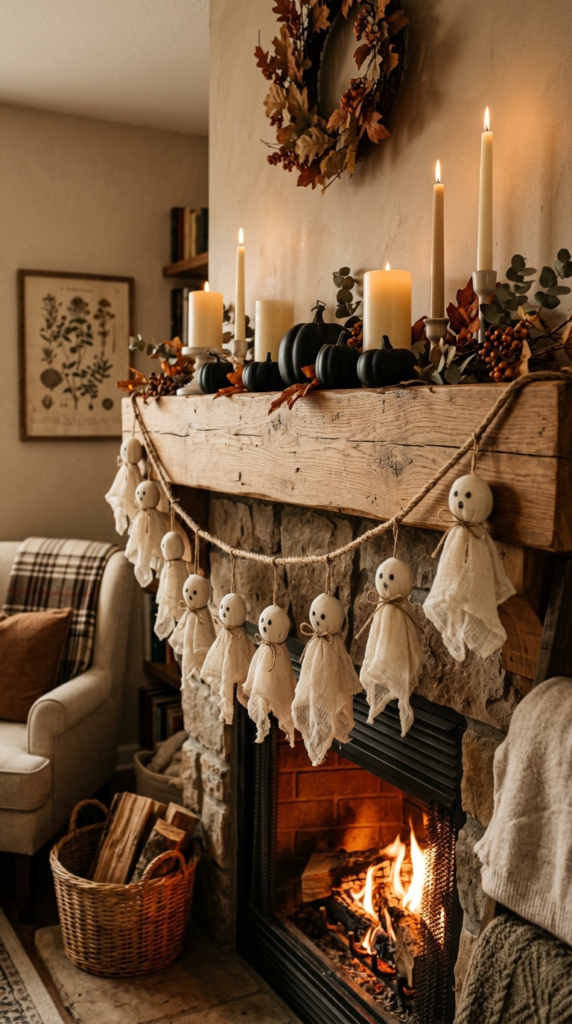
Wrap small squares of cheesecloth or gauze fabric around foam balls, tie them off with twine, and string several along a length of jute rope. Space them a few inches apart so they sway a little when the door opens.
This one is soft and whimsical rather than scary, which makes it perfect for a mantel or a kid’s bedroom.
Recommended accessories: cheesecloth, foam balls, jute twine
[Idea 1 Image] Alt text: DIY cheesecloth ghost garland halloween craft
2. Black Felt Bat Banner
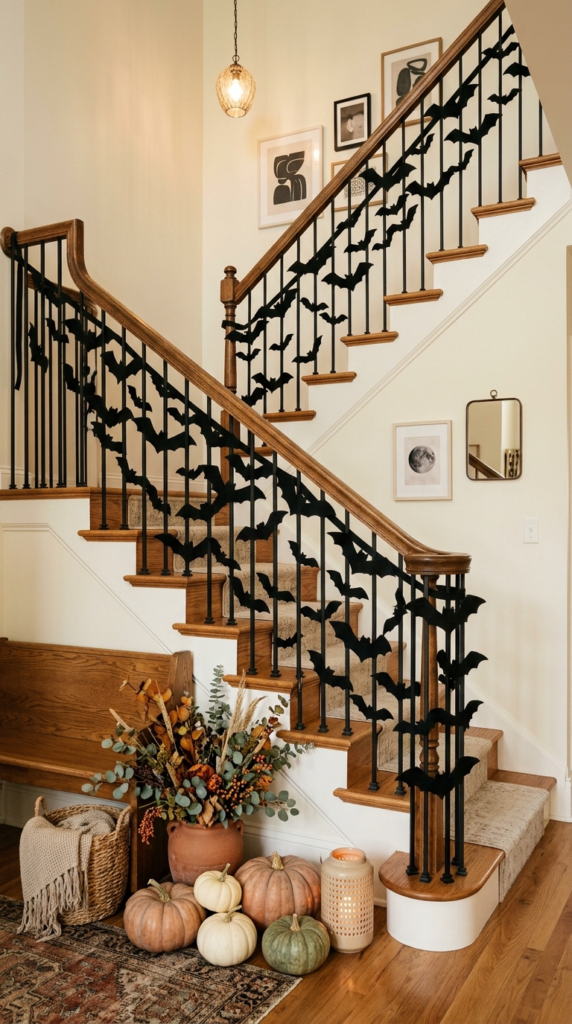
Cut simple bat silhouettes from black felt or cardstock using a template, then punch a small hole in the top of each one. Thread them onto black ribbon or baker’s twine, spacing them evenly.
Hang this along a staircase railing or above a doorway. It’s graphic, modern, and one of the quickest projects on this whole list.
Recommended accessories: black felt, ribbon, hole punch
3. Dried Orange Slice Garland
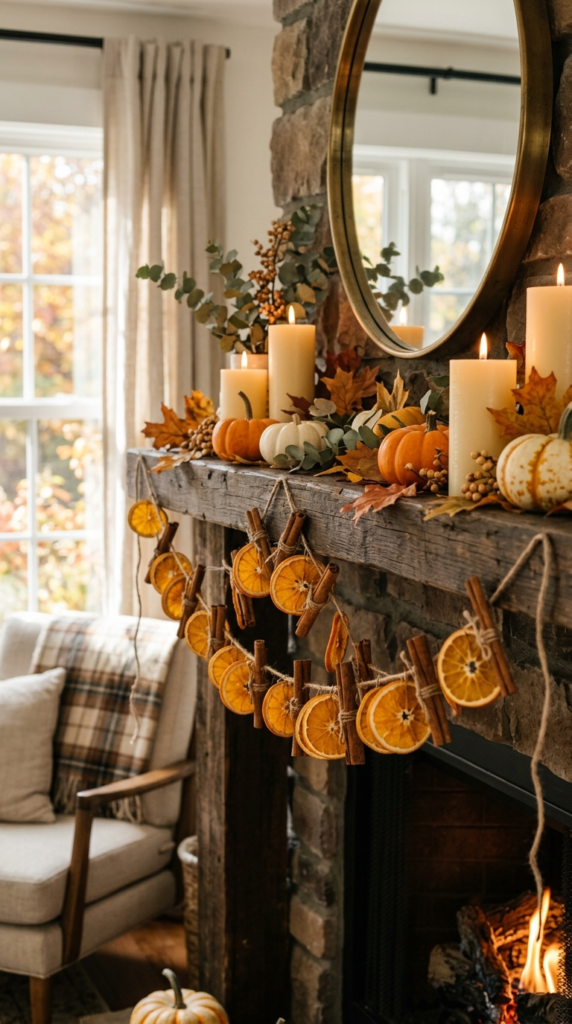
Slice oranges thin, bake them at a low temperature until dried, then string them onto twine using a needle. Add a few cinnamon sticks between slices for texture and a beautiful natural scent.
This garland feels rustic and cozy, and it works just as well for general fall decorating as it does for Halloween.
Recommended accessories: twine, large needle, cinnamon sticks
4. “Boo” Letter Banner
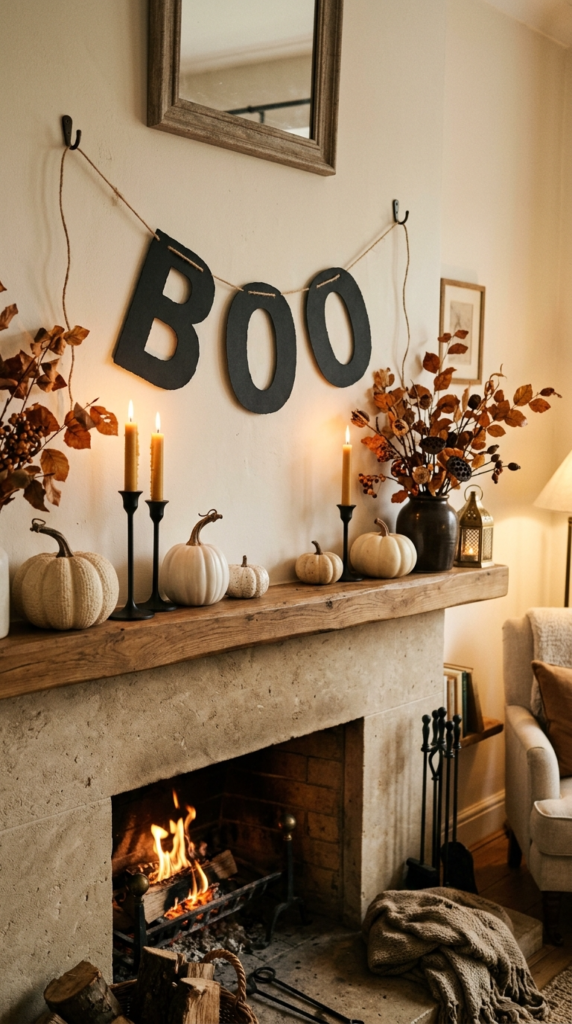
Cut oversized letters spelling “BOO” from black cardstock or kraft paper, then string them onto twine with small clothespins or hot glue. Keep the font simple and bold so it reads well from across the room.
Hang this over a fireplace or on a blank wall for an easy, playful focal point.
Recommended accessories: cardstock, twine, mini clothespins
5. Black and White Triangle Bunting
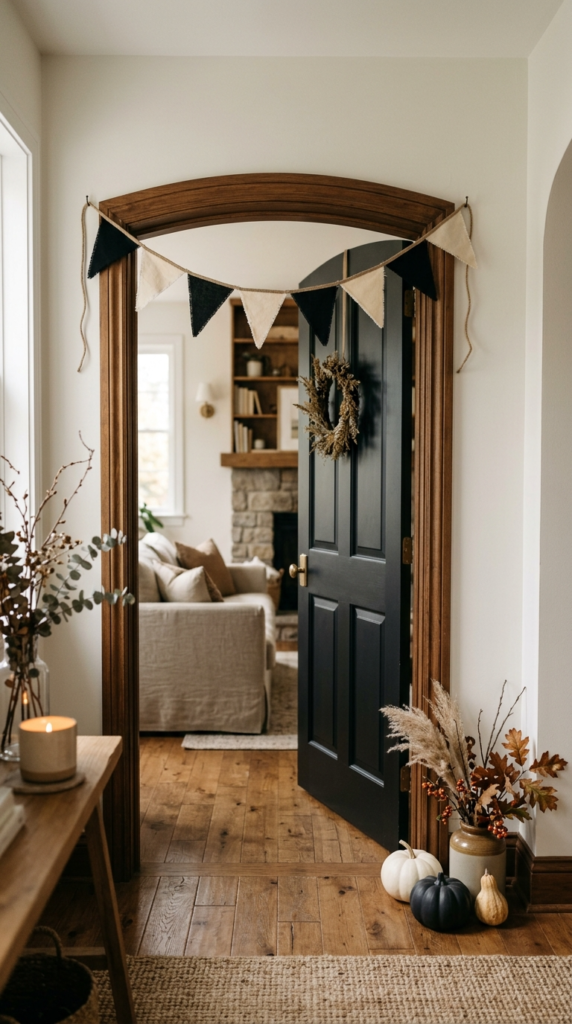
Cut small triangle flags from black and white fabric or cardstock and glue or sew them onto a length of ribbon. Alternate the colors for a graphic, modern pattern.
This bunting style feels a little more elevated than traditional Halloween decor, which makes it a great pick if your home leans modern or minimalist.
Recommended accessories: fabric or cardstock, ribbon, fabric glue
Nadia’s Decorating Tip Always hang garlands with a slight drape instead of pulling them tight. A gentle sag between hanging points looks so much more natural and intentional than a straight, stiff line.
6. Dried Wheat and Ribbon Garland
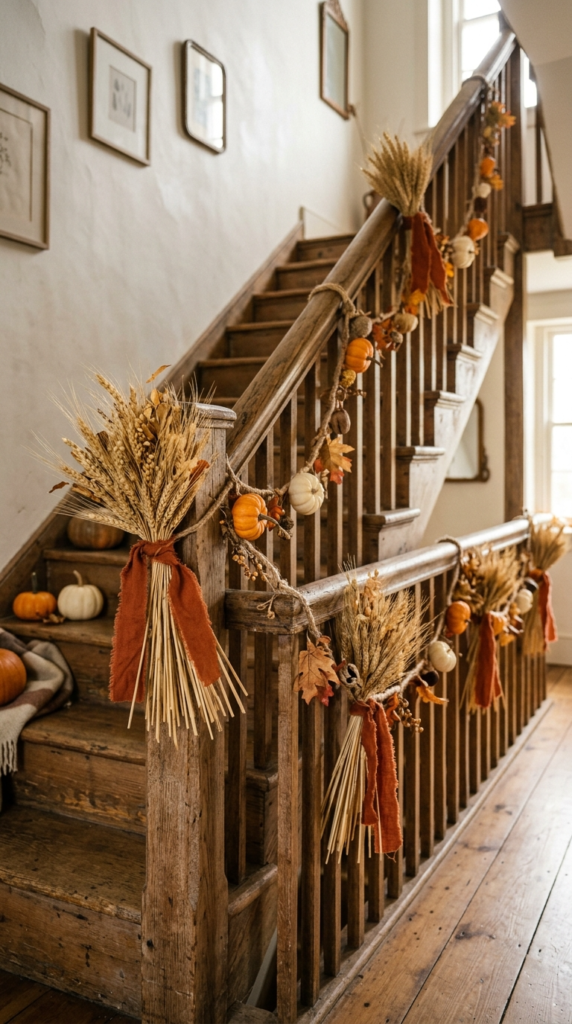
Tie small bundles of dried wheat stems to a length of jute rope using black or rust-colored ribbon. Space the bundles evenly, about six to eight inches apart.
This garland brings in natural texture and pairs beautifully with pumpkins or candles nearby. It’s one of my favorites because it transitions perfectly into Thanksgiving decor too.
Recommended accessories: dried wheat, jute rope, ribbon
7. Spider Web Doily Garland
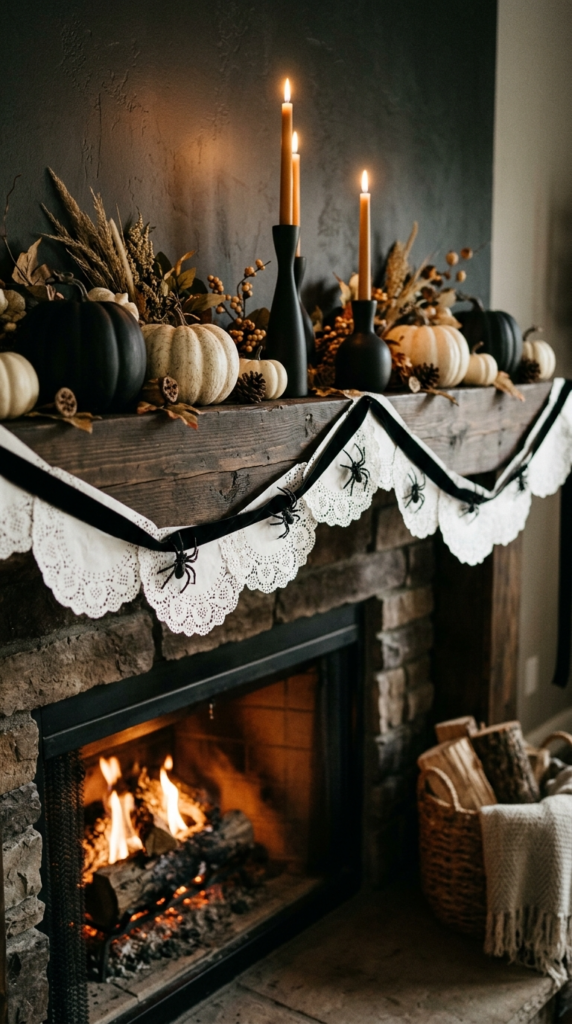
String paper doilies onto black ribbon, spacing them a few inches apart, and let them overlap slightly for a layered, web-like effect. Add a small plastic spider to a few of the doilies for extra detail.
This is a great project to do with kids since it only requires scissors, ribbon, and glue.
Recommended accessories: paper doilies, black ribbon, mini spiders
8. Vintage Book Page Bat Garland
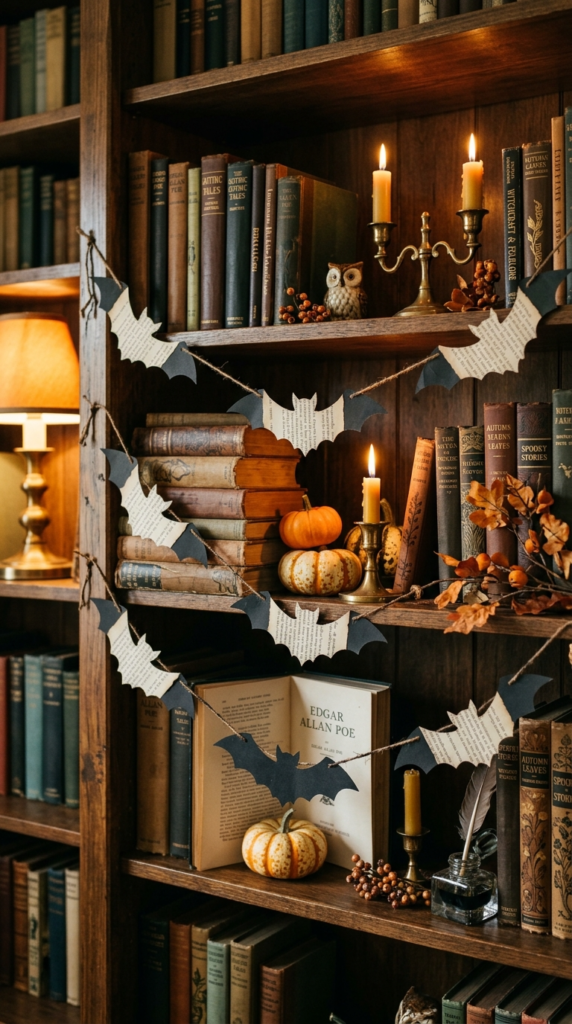
Cut bat silhouettes from old book pages or kraft paper for a softer, vintage look instead of stark black. String them onto twine and hang along a bookshelf or mantel.
This version feels warm and literary rather than spooky, which makes it a lovely fit for a cozy reading nook or living room.
Recommended accessories: book pages, twine, hole punch
9. Pumpkin Silhouette Banner
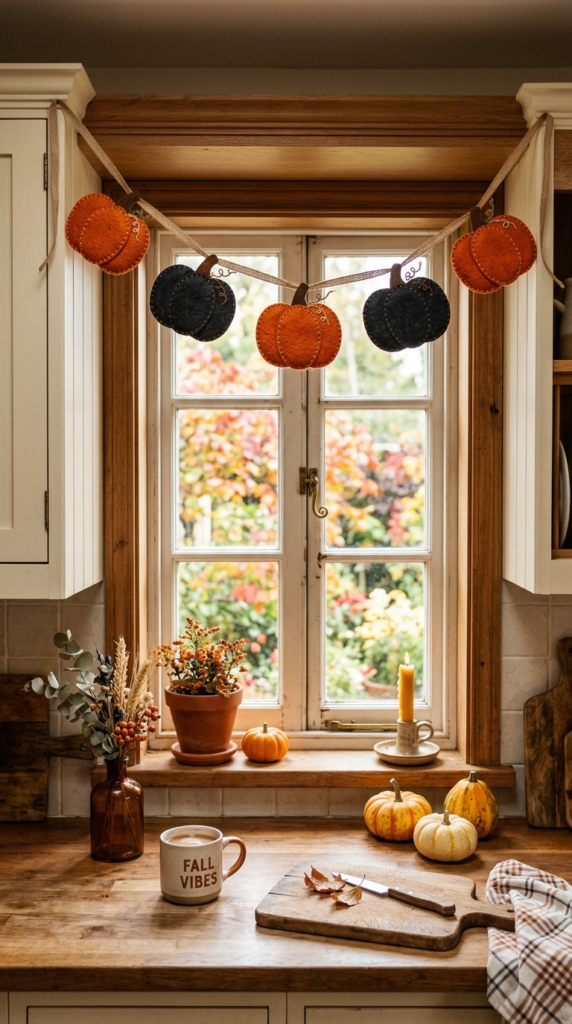
Cut simple pumpkin shapes from orange or black felt, punch holes at the top, and string them onto ribbon. Alternate orange and black pumpkins for contrast, or keep them all one color for a more minimal look.
This banner works well above a kitchen window or along a mantel.
Recommended accessories: felt, ribbon, hole punch
10. Fairy Light Garland with Fabric Ghosts
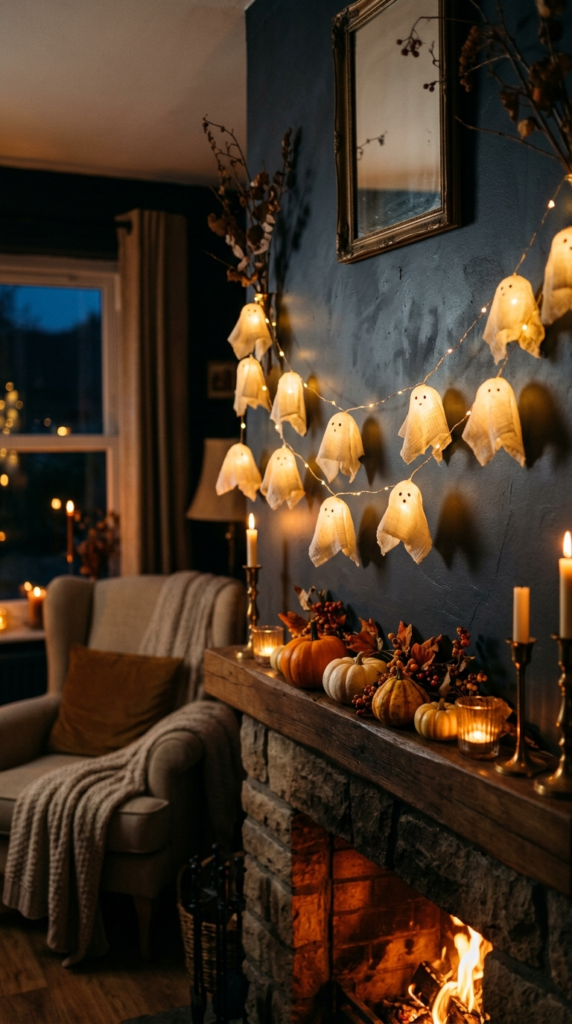
Take a strand of warm white fairy lights and tie tiny fabric ghost shapes along the wire every few inches. At night, the lights glow softly through the fabric for a magical effect.
This is one of my favorite decorating tricks because it combines lighting and garland into one easy project.
Recommended accessories: fairy lights, scrap fabric, thread
Nadia’s Decorating Tip If you’re short on time, choose one garland for your most visible spot, like your mantel or front door, instead of trying to hang one in every room. One well-placed garland has more impact than five rushed ones.
11. Black Tassel Garland
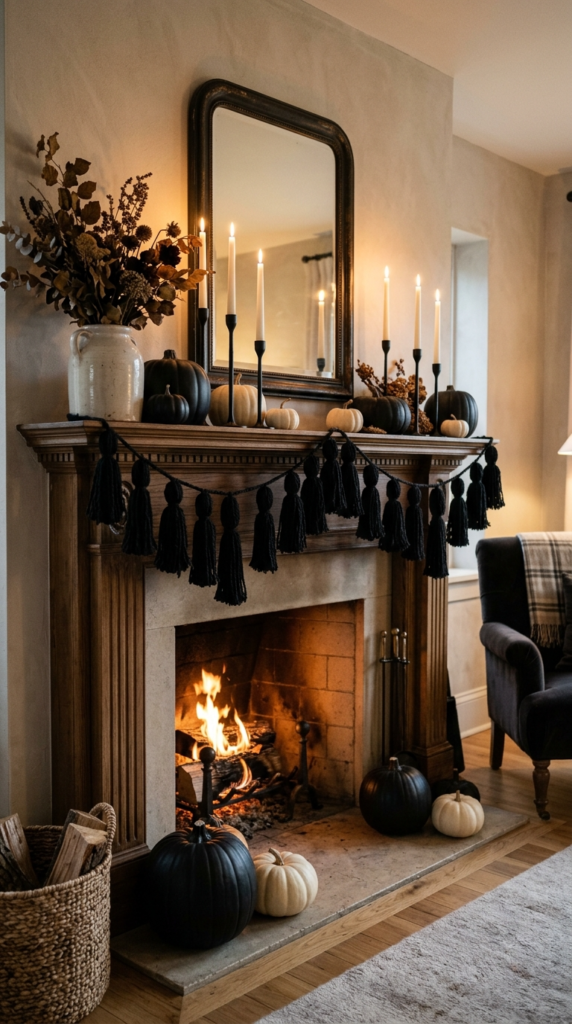
Make small tassels from black yarn or crepe paper streamers and tie them along a length of twine, spacing them close together for a fuller look. This garland adds movement and texture without feeling too literal or costume-like.
It works beautifully draped along a mantel or across a party table.
Recommended accessories: black yarn, twine, scissors
12. Kraft Paper “Happy Halloween” Banner
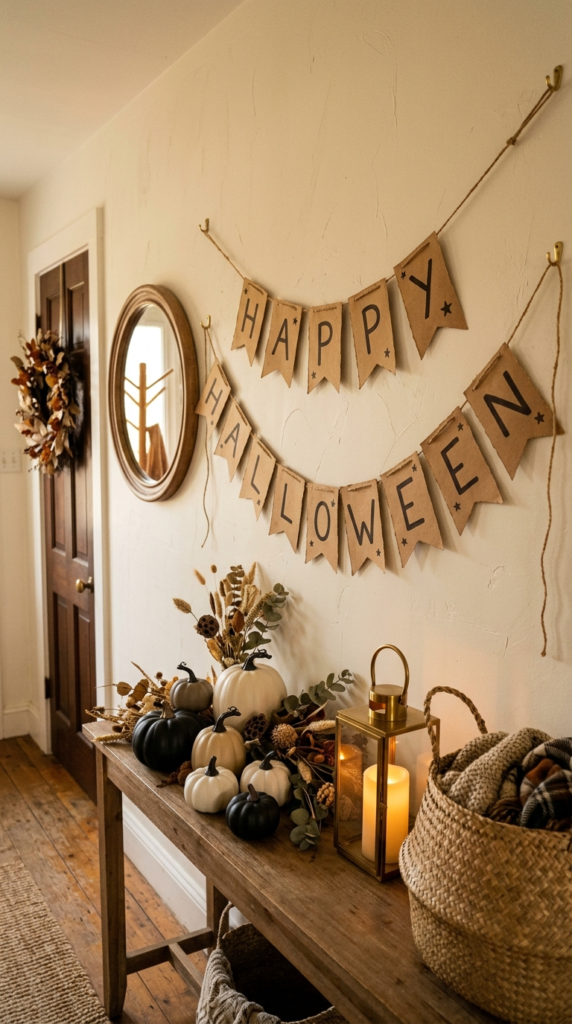
Cut letters from kraft paper or brown cardstock and string them onto black ribbon or twine. The natural brown tone feels warmer and more sophisticated than bright orange or stark black lettering.
Hang this in your entryway to greet guests the moment they walk in.
Recommended accessories: kraft paper, ribbon, glue dots
13. Moon Phase Garland
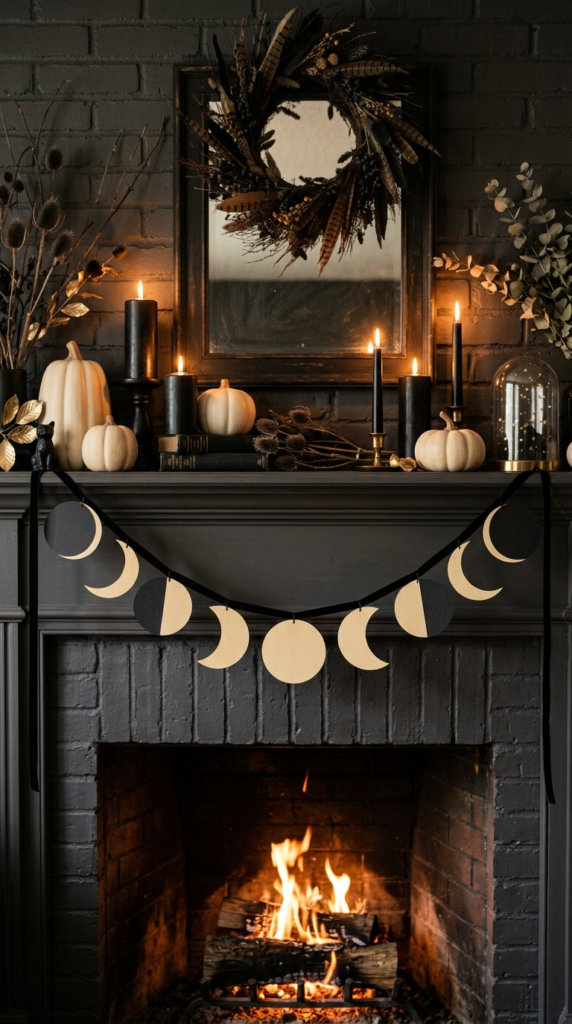
Cut simple moon phase shapes from black and cream cardstock, following a crescent-to-full pattern, and string them onto thin ribbon in order. This is a subtle nod to Halloween that feels elegant and modern rather than traditional.
It’s a great choice if you want something spooky-adjacent without leaning into typical Halloween imagery.
Recommended accessories: black and cream cardstock, thin ribbon
14. Eucalyptus and Black Ribbon Garland
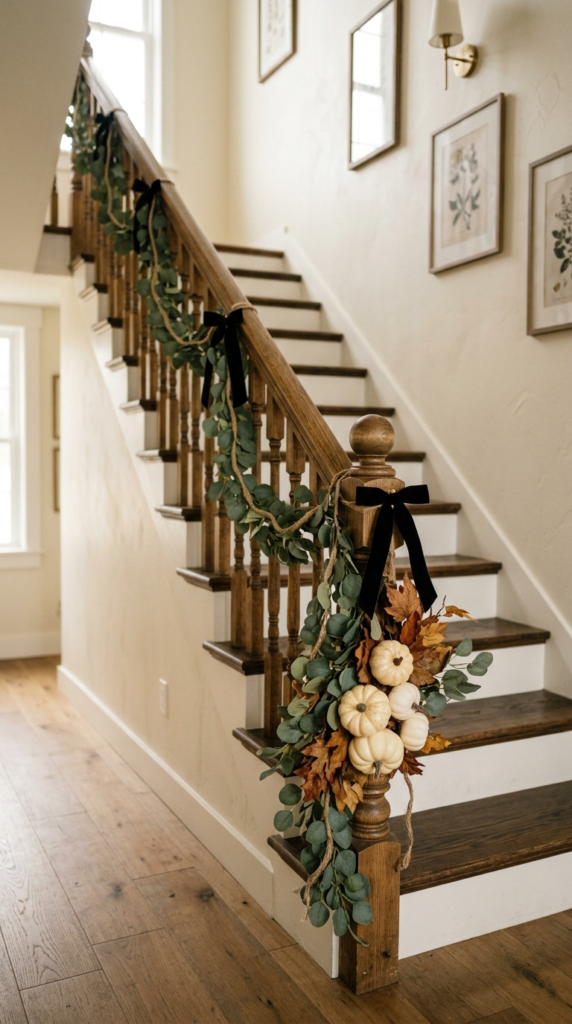
Combine sprigs of faux eucalyptus with small black ribbon bows along a length of twine for a garland that feels more “elegant fall” than “Halloween party.” This is one of the most versatile projects on this list since it works well into November too.
Drape it along your mantel or stair railing for an upscale, layered look.
Recommended accessories: faux eucalyptus, black ribbon, twine
15. Photo Booth Backdrop Banner
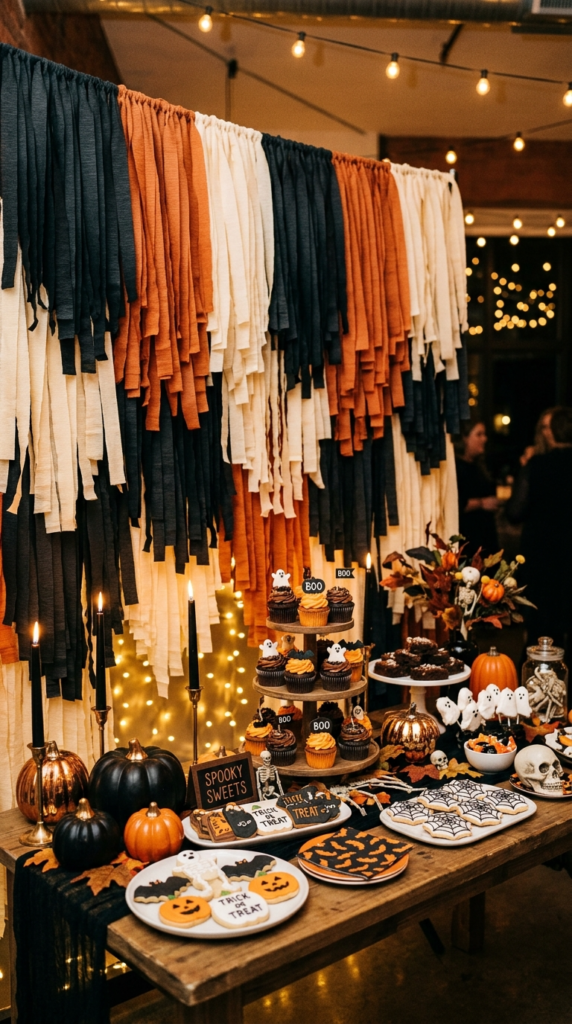
Create a large fringe banner from black, orange, and cream crepe paper streamers attached to a dowel or curtain rod. Hang it as a backdrop for Halloween party photos or above a dessert table.
This is the most party-ready project on the list, and it doubles as instant entertainment for guests.
Recommended accessories: crepe paper streamers, dowel rod, tape
Nadia’s Decorating Tip Store your garlands flat in a shallow box between uses so they don’t get crushed or tangled. A little care means you can reuse your favorites for years instead of starting over each season.
Why You’ll Love This Style
- Every project is budget-friendly, using supplies you likely already own
- Most garlands and banners take under an hour to make
- Many designs work for both Halloween and general fall decorating
- They’re easy to store flat and reuse year after year
- No advanced craft skills are required for any project on this list
- They photograph beautifully, which makes them perfect for Pinterest saves
How to Recreate This Look
- Choose one or two garland styles that match your existing color palette.
- Gather simple supplies like felt, cardstock, twine, and ribbon before you start.
- Cut all your shapes first, then assemble the garland in one sitting.
- Hang your garland with a gentle drape rather than pulling it tight.
- Add warm lighting nearby to make the display feel cozy at night.
- Reserve your favorite spot, like a mantel or doorway, for your most detailed garland.
Common Decorating Mistakes to Avoid
- Making the garland too short. Measure your space first so it doesn’t look skimpy once it’s hung.
- Hanging it too tight. A slight sag looks far more natural than a straight, stretched line.
- Mixing too many styles at once. Stick to one or two garland types per room for a cohesive look.
- Skipping the color plan. Decide on your palette before you start cutting shapes.
- Using flimsy paper. Cardstock holds up much better than regular printer paper for cutouts.
- Forgetting to test the hanging spot. Check your hooks or tape hold the weight before you walk away.
Nadia’s Favorite Styling Tips
- Layer a garland with a few faux pumpkins or candles below it for a fuller display.
- Choose one focal garland for your most visible space instead of decorating every room.
- Warm white lights paired with a garland always feel cozier than colored lights.
- Cardstock and felt hold their shape better than paper for cutout garlands.
- Save leftover ribbon and twine from other projects. They work perfectly for garlands too.
- Involve kids in the simple cutting and stringing steps for a fun family project.
- Take a step back and view your garland from across the room before finalizing the placement.
Frequently Asked Questions
What supplies do I need for a DIY Halloween garland? Most garlands only need cardstock or felt, ribbon or twine, scissors, and a hole punch or glue.
How long does it take to make a DIY Halloween garland? Most of these projects take thirty minutes to an hour, depending on how many pieces you cut.
Can these garlands be reused every year? Yes. Store them flat in a box between seasons and most will last for several years.
What’s the easiest garland on this list for beginners? The black felt bat banner is one of the simplest, since it only requires cutting and stringing shapes.
Can I make these garlands with kids? Absolutely. Cheesecloth ghosts, doily spider webs, and tassel garlands are all great kid-friendly projects.
Do I need a sewing machine for any of these? No. Every project on this list can be made with glue, tape, or simple hand-stringing.
How do I hang a garland without damaging my walls? Use removable hooks or command strips instead of nails, especially for renters.
What’s a good garland for a Halloween party? The photo booth backdrop banner and the black tassel garland both work beautifully for party settings.
Conclusion
There you have it, friend. Fifteen DIY Halloween garlands and banners that prove a few simple supplies can completely transform a room.
Whether you go spooky with bats and spider webs or cozy with dried wheat and eucalyptus, these projects are budget-friendly, beginner-approved, and ready to hang in under an hour. Pick one or two that match your style, and let your mantel or doorway do the talking this season.
Save this post to Pinterest so you have it ready when it’s time to start crafting.
More Home Decor Inspiration
Looking for more beautiful home decorating ideas? Visit Nadia Daily Living for cozy decorating inspiration, seasonal home styling, affordable decorating tips, DIY ideas, organization hacks, and beautiful interiors you’ll love.
Keep the fall crafting going with these reader favorites:
- 20 Halloween DIY Date Night Ideas for Couples
- 25 Cheap Halloween Decorations That Look Anything But Cheap
- 25 Fall & Halloween DIY Projects Couples Can Make Together
- 20 DIY Halloween Decorations and Spooky Crafts for Your Home
- 25 DIY Christmas Wreath Ideas for Every Style
- 30 DIY Christmas Centerpiece Ideas for Your Table
- 27 Halloween Living Room Décor Ideas That Look Chic, Not Scary
- 35 Cozy Fall Decor Ideas That Make Your Home Feel Like Autumn
Happy Crafting!
— Nadia James
Founder & Editor Nadia Daily Living